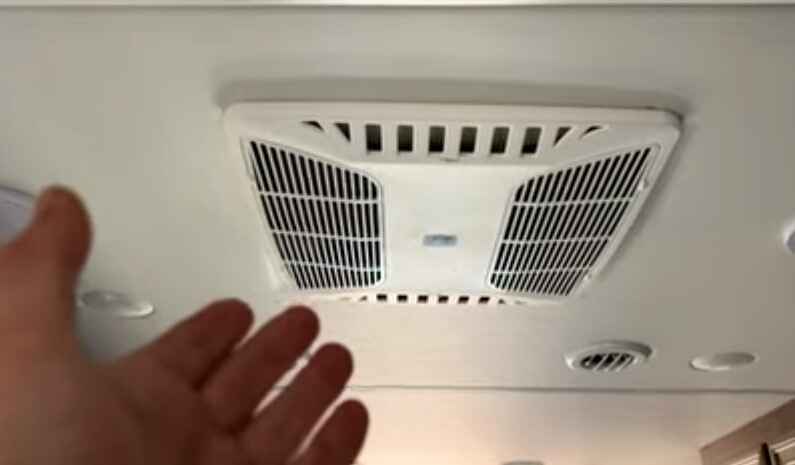
To address Coleman Mach AC troubleshooting problems, check the thermostat settings, ensure proper power supply, clean or replace air filters, and inspect for any debris blocking airflow. If issues persist, consult the user manual or seek professional assistance.
Navigating through Coleman Mach AC troubleshooting problems can be a daunting task for beginners. The intricacies of troubleshooting these issues often leave individuals scratching their heads. In this blog post, we simplify the process, offering a beginner-friendly guide to unraveling the mysteries behind common Coleman Mach AC problems. From understanding peculiar sounds to decoding error messages, we’ve got you covered. Say goodbye to the perplexity surrounding your Coleman Mach AC unit and embark on a troubleshooting journey tailored for beginners.
Overview of Coleman Mach AC units and Its Features
Coleman Mach AC units are renowned for their reliability and efficiency, making them a popular choice for RV owners and campers seeking climate control solutions. Developed by Coleman-Mach, a leading brand in recreational vehicle comfort systems, these AC units are designed to withstand the rigors of travel while providing optimal cooling performance. Let’s delve into the features that make Coleman Mach AC units stand out.
1. High Cooling Capacity:
One of the standout features of Coleman Mach AC units is their impressive cooling capacity. These units are engineered to efficiently cool the confined spaces of RVs and campers, ensuring a comfortable environment even in the scorching heat. The powerful cooling performance is crucial for enhancing the overall comfort of the travel experience.
2. Energy Efficiency:
Coleman Mach AC units are designed with energy efficiency in mind. The units incorporate advanced technology to deliver effective cooling while minimizing energy consumption. This not only helps RV owners conserve energy resources but also extends the lifespan of the unit, making it a sustainable and cost-effective choice.
3. Lightweight and Compact Design:
For RV enthusiasts, space and weight are precious commodities. Coleman Mach AC units are known for their lightweight and compact design, making them ideal for installation on various RV models. The streamlined design ensures that the AC unit doesn’t add unnecessary bulk to the vehicle, contributing to better fuel efficiency and ease of travel.
4. Durable Construction:
Traveling can expose AC units to various environmental challenges, from road vibrations to extreme temperatures. Coleman Mach AC units are built with durability in mind, featuring robust materials and construction. This ensures that the units can withstand the bumps and jolts of the road, providing reliable performance throughout the journey.
5. Easy Installation and Maintenance:
Coleman Mach AC units are designed for user-friendly installation and maintenance. The manufacturer provides clear instructions, and the units often come with convenient features such as easy-access panels, washable filters, and modular components. This simplifies both the initial setup and routine maintenance tasks, ensuring a hassle-free experience for RV owners.
6. Quiet Operation:
Comfort is not only about temperature but also about a peaceful atmosphere. Coleman Mach AC units are engineered for quiet operation, minimizing noise levels to enhance the overall comfort of the RV interior. This feature is particularly appreciated during nighttime use, allowing occupants to rest undisturbed while still enjoying optimal climate control.
7. Optional Heat Pump Functionality:
In addition to cooling capabilities, many Coleman Mach AC units come with optional heat pump functionality. This versatile feature allows users to both cool and heat their RV interior, providing a comprehensive solution for climate control. The heat pump option ensures comfort in a wide range of weather conditions, making Coleman Mach AC units adaptable for year-round use.
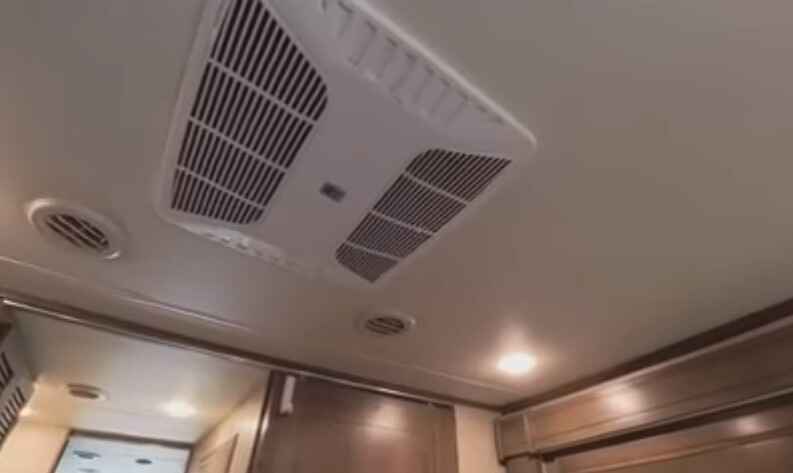
Importance of Proper Functioning AC in Recreational Vehicles
Proper functioning air conditioning (AC) systems are essential for the comfort and well-being of occupants in recreational vehicles (RVs). Among the various AC units available, the Coleman Mach AC stands out as a popular choice for RV owners due to its reliability and efficiency. In this discussion, we will delve into the importance of a properly working AC system in recreational vehicles, emphasizing the features and benefits associated with the Coleman Mach AC.
- Temperature Regulation:
- One of the primary functions of the Coleman Mach AC in RVs is temperature regulation. It ensures a comfortable interior environment, especially during hot summer months or in regions with high temperatures.
- The Coleman Mach AC is designed to cool the RV efficiently, allowing occupants to escape the heat and enjoy a pleasant atmosphere inside the vehicle.
- Enhanced Comfort During Travel:
- Long journeys in an RV can be challenging without a reliable AC system. The Coleman Mach AC not only cools the air but also reduces humidity, creating a more comfortable and enjoyable travel experience.
- Proper temperature control minimizes fatigue and ensures that occupants arrive at their destination feeling refreshed.
- Improved Indoor Air Quality:
- The Coleman Mach AC incorporates air filtration systems that help improve indoor air quality by removing dust, pollen, and other airborne particles. This is crucial for individuals with allergies or respiratory issues.
- Clean and fresh air inside the RV contributes to a healthier and more pleasant living environment for occupants.
- Sleep Quality:
- A well-functioning AC system, such as the Coleman Mach AC, plays a significant role in ensuring a good night’s sleep for RV occupants. Maintaining a cool and comfortable temperature is essential for quality rest.
- The Coleman Mach AC units are known for their quiet operation, minimizing noise disturbances during the night and promoting a peaceful sleeping environment.
- Preservation of Interior Components:
- Proper temperature control is essential for preserving the integrity of various interior components in an RV. Excessive heat can damage electronics, appliances, and other sensitive equipment.
- The Coleman Mach AC helps protect the investment in the RV by preventing overheating and potential damage to valuable items inside.
- Energy Efficiency:
- The Coleman Mach AC units are designed with energy efficiency in mind, helping RV owners conserve power while enjoying a comfortable climate.
- This not only contributes to a reduced environmental impact but also allows RV enthusiasts to extend their time off-grid without worrying about excessive power consumption.
- Reliability on the Road:
- The reliability of the Coleman Mach AC is crucial for RV owners who frequently travel to different locations. Dependable AC units ensure that occupants can count on a consistent and comfortable environment, regardless of the external conditions.
- The Coleman Mach AC’s robust design and reputation for durability make it a trusted choice for RV enthusiasts seeking a reliable climate control solution.
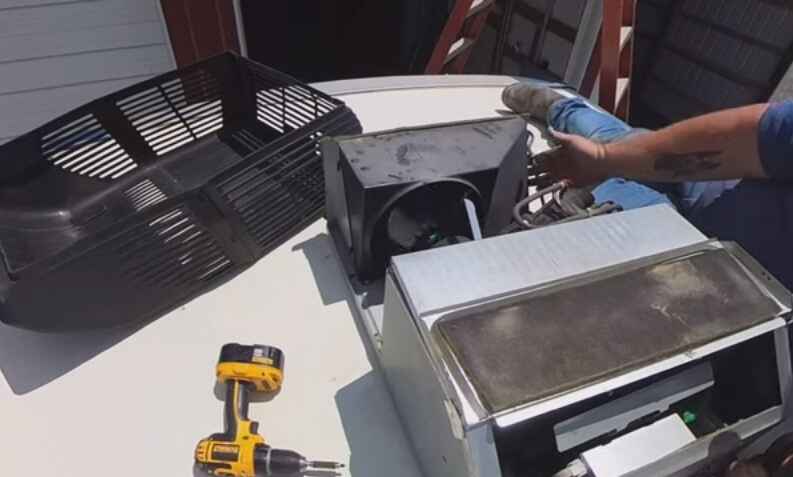
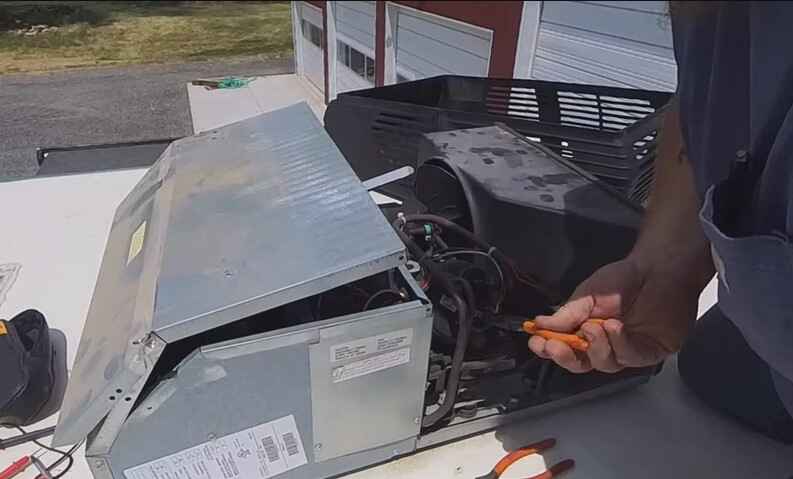
Coleman Mach AC Troubleshooting Problems
When it comes to keeping your recreational vehicle cool during hot summer days, the Coleman Mach AC is a popular choice. However, like any appliance, it may encounter issues over time. In this troubleshooting guide, we’ll address common problems associated with Coleman Mach AC units, providing step by step solutions to help you enjoy a comfortable and cool environment in your RV.
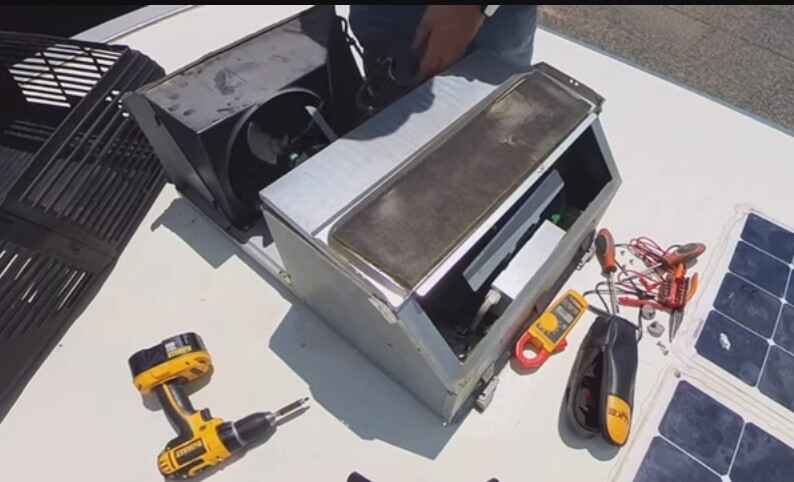
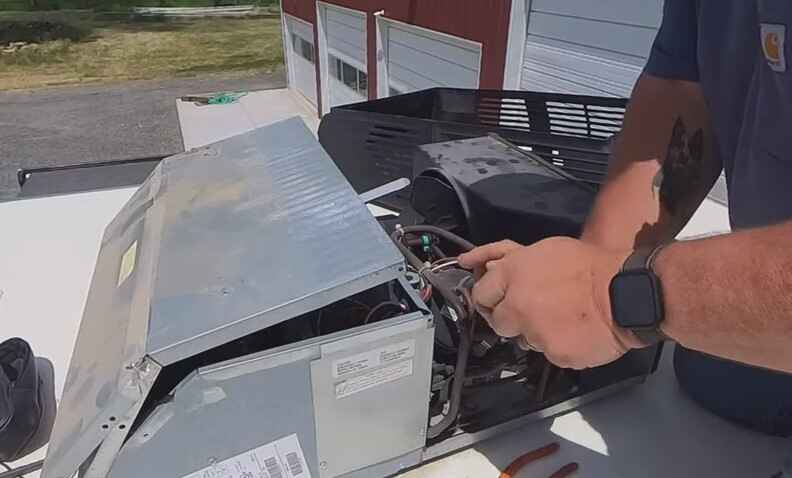
Compressor not coming on
If your Coleman Mach AC compressor is not coming on, there are several troubleshooting steps you can take to identify and potentially resolve the issue. Keep in mind that working with electrical components requires caution, and if you’re not comfortable doing so, it’s advisable to seek professional help. Here’s a step-by-step guide to help you troubleshoot the problem:
- Check Power Supply:
- Ensure that your RV or camper is properly connected to a power source. Verify that the AC unit is receiving the correct voltage.
- Check the circuit breakers in your RV’s electrical panel to make sure they haven’t tripped. Reset any tripped breakers.
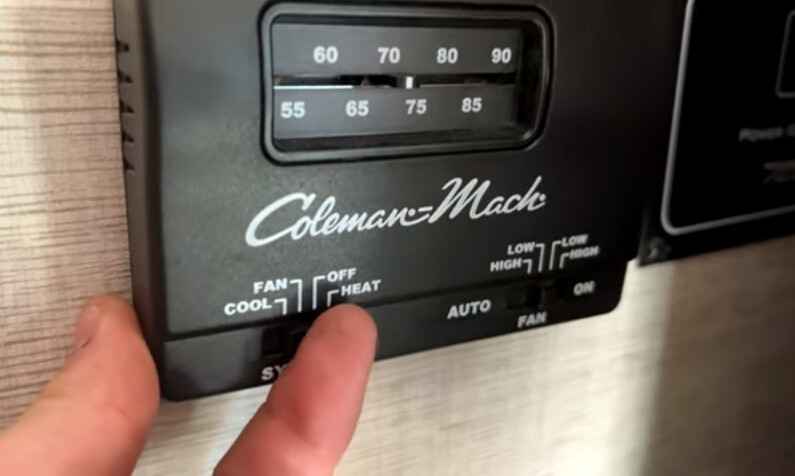
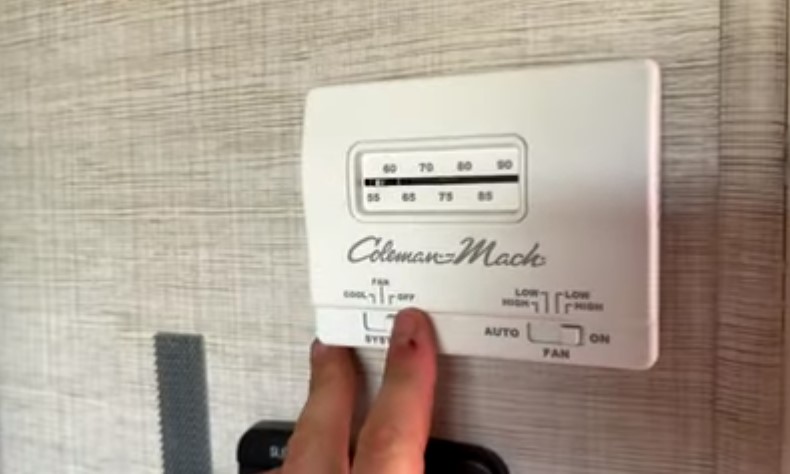
- Thermostat Settings:
- Confirm that the thermostat is set to a temperature lower than the current room temperature.
- Try adjusting the thermostat settings to see if the compressor engages.
- Thermostat Replacement or Testing:
- If adjusting the thermostat doesn’t work, you might need to replace it or test it for functionality.
- Test the thermostat by bypassing it temporarily. If the compressor starts when the thermostat is bypassed, you may need a new thermostat.
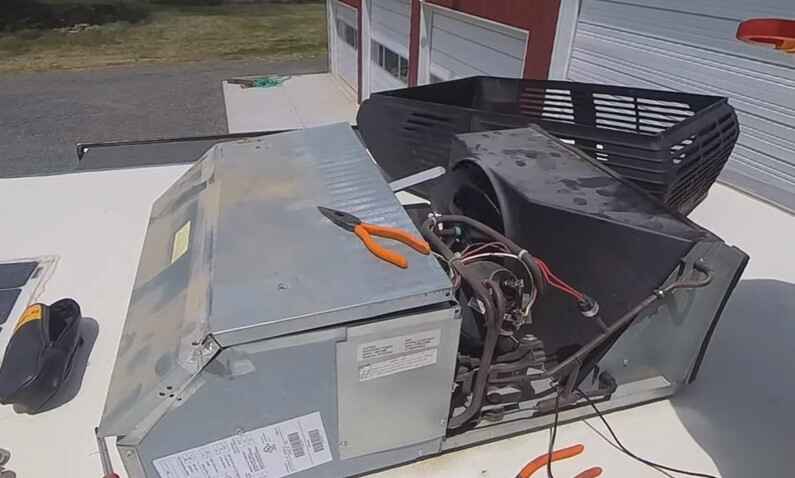
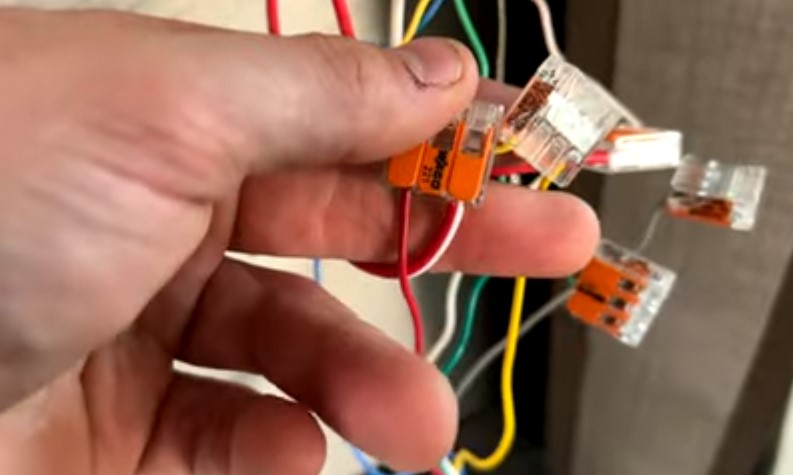
- Check for Wiring Issues:
- Inspect the wiring between the thermostat and the AC unit for any visible damage or loose connections.
- If you’re comfortable with electrical work, use a multimeter to check for continuity in the wiring.
- Capacitor Check:
- The capacitor is a common component that can fail. Check for any signs of a bulging or leaking capacitor.
- If you have a multimeter, you can test the capacitor for proper functionality. Replace the capacitor if it’s defective.
- Start Capacitor Inspection (if applicable):
- Some units have a separate start capacitor. Check it for visible damage and test it if possible.
- If the start capacitor is faulty, it may prevent the compressor from starting.
- Compressor Overload Protection:
- The compressor may have a thermal overload protection feature. If it overheats, it will temporarily shut down. Allow some time for it to cool down and try again.
- If this happens frequently, it could indicate an issue with the compressor or its cooling system.
- Refrigerant Levels:
- Low refrigerant levels can cause the compressor to shut off. Consult the manual or a professional to check and recharge the refrigerant if needed.
- Professional Assistance:
- If you’ve gone through the above steps and the issue persists, it may be time to consult a professional technician or the Coleman Mach AC manufacturer for further assistance.
- Attempting complex repairs without the necessary expertise may lead to more damage.
Fan not working
If you’re experiencing issues with your Coleman Mach AC fan not working, there are several troubleshooting steps you can take to identify and possibly resolve the problem. Keep in mind that these suggestions are general and may not cover all possible scenarios. Always refer to your specific Coleman Mach AC model’s manual for accurate information.
- Check Power Supply:
- Ensure that the RV is properly connected to a power source. Verify that the circuit breaker or fuse for the Coleman Mach AC is not tripped or blown.
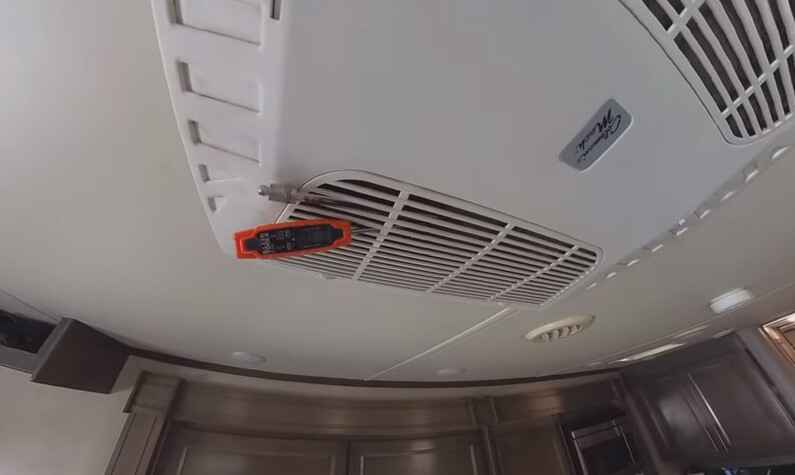
- Confirm that there is power reaching the AC unit. You may want to use a multimeter to check voltage at the AC unit’s power terminals.
- Thermostat Settings:
- Examine the thermostat settings to make sure the fan is set to the desired mode (e.g., “Fan Auto” or “Fan On”). Adjust the thermostat settings and observe if the fan starts working.
- Thermostat Batteries:
- If your thermostat uses batteries, replace them or ensure they are in good condition. Weak or dead batteries can affect the thermostat’s ability to control the AC unit.
- Blown Fuse on Control Board:
- Check the control board inside the AC unit for a blown fuse. If the fuse is blown, replace it with one of the same rating. Blown fuses can result from power surges or electrical issues.
- Capacitor Issues:
- Inspect the capacitor(s) on the AC unit’s control board. A faulty capacitor can prevent the fan from operating. If you’re not familiar with capacitor testing, it’s advisable to seek assistance from a qualified technician.
- Wiring Connections:
- Examine the wiring connections between the thermostat, control board, and fan motor. Loose or disconnected wires can interrupt the electrical flow. Reconnect any loose wires and ensure proper insulation.
- Motor Problems:
- If all else fails, there could be an issue with the fan motor itself. It might be faulty or burned out. A qualified technician should inspect the motor and replace it if necessary.
- Temperature Sensor:
- Some Coleman Mach AC units have temperature sensors that may affect the fan operation. Ensure that the sensor is clean and properly positioned. Refer to the user manual for guidance on sensor maintenance.
- Remote Control (if applicable):
- If your Coleman Mach AC comes with a remote control, check its batteries and functionality. Some issues might be related to communication problems between the remote and the AC unit.
Freezing up
If your Coleman Mach AC unit is freezing up, it’s essential to address the issue promptly to ensure proper functionality and prevent potential damage. Here’s a step-by-step troubleshooting guide to help you resolve the problem:
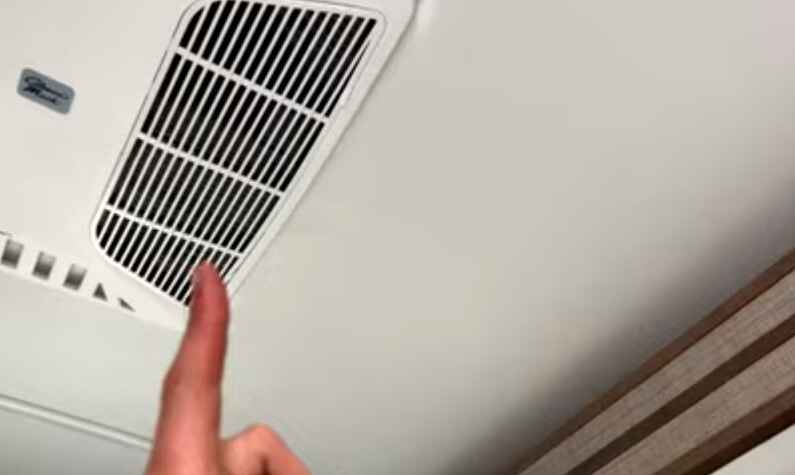
- Check Air Filters:
- Ensure that the air filters in your Coleman Mach AC unit are clean and free from debris. Clogged filters can restrict airflow, leading to freezing.
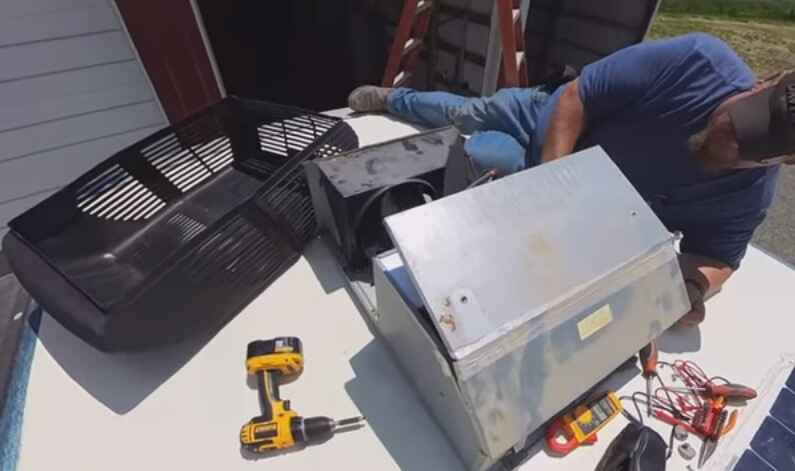
- Inspect Evaporator Coils:
- Examine the evaporator coils for dirt or ice buildup. Clean the coils if necessary using a soft brush or vacuum cleaner. Ice accumulation can hinder the cooling process.
- Thermostat Settings:
- Verify that the thermostat is set to the correct temperature. If the setting is too low, the AC might run continuously, causing freezing.
- Fan Operation:
- Make sure the fan is functioning correctly. A malfunctioning fan can contribute to freezing as it affects proper air circulation. Check the fan motor and blades for any issues.
- Refrigerant Levels:
- Low refrigerant levels can lead to freezing. Consult a professional technician to check and replenish refrigerant levels if necessary. Avoid handling refrigerant yourself, as it requires specialized knowledge and equipment.
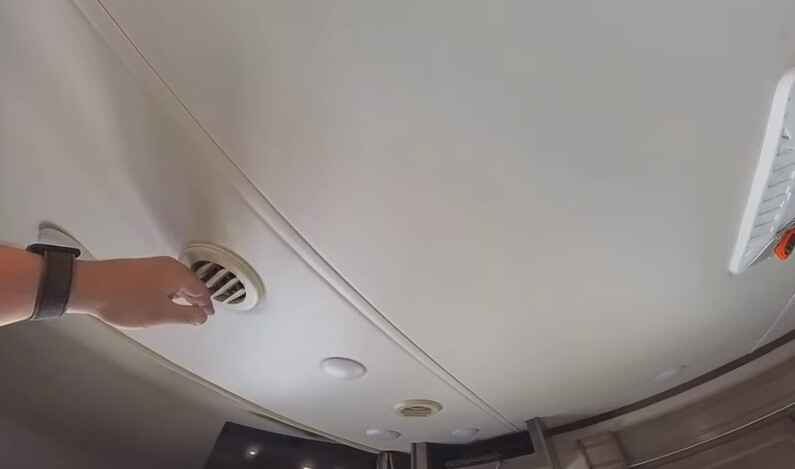
- Air Ducts and Vents:
- Inspect the air ducts and vents for blockages or obstructions. Restricted airflow can cause the evaporator coils to freeze. Ensure that the vents are open and unobstructed.
- Ambient Temperature:
- Extremely low outdoor temperatures can sometimes cause AC units to freeze. If this is the case, consider using a thermostat with a built-in temperature sensor or a low-ambient kit designed for Coleman Mach AC units.
- Check for Leaks:
- Examine the AC unit for any signs of refrigerant leaks. Leaks can contribute to freezing and should be addressed by a professional technician.
- Thermostat Location:
- Ensure that the thermostat is not located near a cold air source or exposed to direct sunlight. Incorrect thermostat placement can lead to inaccurate temperature readings and inefficient operation.
- Professional Inspection:
- If the issue persists after performing the above steps, it’s advisable to consult a professional HVAC technician. They can conduct a thorough inspection, identify any underlying problems, and perform the necessary repairs.
Leaking water
If your Coleman Mach AC unit is leaking water, it could be due to various reasons. Here are some troubleshooting steps you can take to address the issue:
- Check the Condensate Drain:
- Ensure that the condensate drain is not clogged. Over time, dust, debris, and algae can accumulate in the drain, causing a blockage. Clean the drain line using a pipe cleaner or a mixture of water and bleach.
- Inspect the Gasket:
- Examine the gasket between the AC unit and the roof. If the gasket is damaged or worn out, it may allow water to seep in. Replace the gasket if necessary.
- Verify the Unit’s Level:
- Make sure that the Coleman Mach AC unit is installed level on the roof. If the unit is not level, water may pool in certain areas and lead to leaks. Use a level to check and adjust the positioning if needed.
- Examine the Roof Sealant:
- Inspect the roof sealant around the Coleman Mach AC unit. If the sealant is cracked or deteriorated, it may allow water to penetrate. Reapply roof sealant as needed to ensure a watertight seal.
- Check for Ice Buildup:
- If you notice ice forming on the evaporator coils, it can contribute to water leakage when the ice melts. Check for proper airflow, clean or replace air filters, and ensure that vents are not obstructed.
- Inspect the Condensate Pan:
- Examine the condensate pan for cracks or damage. A damaged pan can lead to water leaks. Replace the condensate pan if necessary.
- Ensure Proper Insulation:
- Check for adequate insulation on the refrigerant lines. Poor insulation can result in condensation, leading to water dripping. Add or replace insulation where needed.
- Clean the Evaporator Coils:
- Dirty evaporator coils can cause inefficient cooling and excess condensation. Clean the coils using a soft brush or compressed air to remove dust and debris.
- Consult the Manual:
- Refer to the Coleman Mach AC unit’s manual for specific troubleshooting tips and maintenance guidelines. It may provide additional insights into the problem and offer solutions.
- Professional Inspection:
- If the issue persists or if you are uncertain about performing these tasks, consider contacting a professional HVAC technician to inspect and service the Coleman Mach AC unit.
Not blowing cold air
If your Coleman Mach AC unit is not blowing cold air, several potential issues could be causing the problem. Here is a step-by-step troubleshooting guide to help you identify and address the issue:
- Power Supply Check:
- Ensure that the RV or the location where the Coleman Mach AC unit is installed has a stable power supply. Check the circuit breaker or fuse box to make sure there are no tripped breakers or blown fuses.
- Thermostat Settings:
- Verify that the thermostat settings are correctly configured for cooling mode. Ensure that the temperature setting is lower than the current ambient temperature to activate the cooling function.
- Air Filter Inspection:
- Dirty or clogged air filters can restrict airflow and reduce the efficiency of the Coleman Mach AC unit. Check and clean or replace the air filter if necessary. A clean filter ensures proper air circulation and cooling performance.
- Condenser Coils:
- Examine the condenser coils on the exterior unit. If they are covered with dirt, dust, or debris, it can hinder the heat exchange process. Clean the coils carefully using a soft brush or compressed air to improve cooling efficiency.
- Refrigerant Levels:
- Insufficient refrigerant levels can lead to poor cooling performance. If you suspect a refrigerant issue, it’s recommended to contact a professional HVAC technician. Handling refrigerants without proper knowledge and equipment can be dangerous.
- Capacitor Check:
- The start capacitor and run capacitor play crucial roles in the operation of the Coleman Mach AC unit. A malfunctioning capacitor can result in the compressor not starting. If you notice any signs of damage or bulging, it’s advisable to replace the capacitor.
- Fan Motor Inspection:
- Verify that the fan motor is functioning properly. If the fan is not running or is running slowly, it can impact the cooling process. Check for any obstructions in the fan blades and ensure the motor is receiving power.
- Temperature Sensor Calibration:
- Some Coleman Mach AC units have temperature sensors that may need calibration. Refer to the user manual for instructions on how to calibrate the temperature sensor to ensure accurate temperature readings.
- Professional Assistance:
- If you have gone through the above steps and the issue persists, it’s advisable to seek professional assistance. Certified HVAC technicians have the expertise and tools to diagnose and repair complex issues with the Coleman Mach AC unit.
Not cooling
If your Coleman Mach AC unit is not cooling properly, there are several troubleshooting steps you can take to identify and address the issue. Follow these steps to help diagnose and potentially resolve the problem:
- Check the Power Supply:
- Ensure that the RV is properly connected to a power source, and the Coleman Mach AC unit is receiving power.
- Check the circuit breakers and fuses to make sure none of them are tripped or blown.
- Thermostat Settings:
- Verify that the thermostat is set to the desired temperature and mode (cooling).
- If the thermostat uses batteries, replace them with fresh ones.
- Air Filter Inspection:
- Dirty or clogged air filters can restrict airflow and reduce cooling efficiency. Check the air filter and clean or replace it if necessary. Refer to the Coleman Mach AC manual for specific instructions on filter maintenance.
- Condenser Coils:
- Inspect the condenser coils on the external unit for dirt, debris, or obstructions. Clean the coils with a soft brush or compressed air to enhance heat exchange efficiency.
- Refrigerant Levels:
- Low refrigerant levels can affect cooling performance. If you suspect a refrigerant issue, it’s recommended to contact a professional HVAC technician to check and recharge the system.
- Inspect for Leaks:
- Check for any visible refrigerant leaks around the AC unit. If you notice any leaks, it’s crucial to contact a technician for repairs.
- Fan Operation:
- Confirm that both the indoor and outdoor fans are operating correctly. If not, there may be an issue with the fan motor, capacitor, or other components.
- Temperature Differential:
- Measure the temperature differential between the air entering the AC unit and the cooled air exiting it. A significant difference indicates proper cooling. If the differential is low, it may signify a problem with the compressor or refrigeration system.
- Check for Ice Buildup:
- Inspect the evaporator coils for ice buildup. If you see ice, it could be a sign of low refrigerant, restricted airflow, or other issues. Allow the ice to melt before attempting to use the unit again.
- Professional Assistance:
- If you’ve gone through the above steps and the issue persists, or if you’re uncomfortable performing certain checks, it’s advisable to seek professional assistance from a certified RV HVAC technician familiar with Coleman Mach AC units.
Not turning on
Troubleshooting a Coleman Mach AC unit that is not turning on requires a systematic approach to identify and address potential issues. Follow these steps to diagnose and resolve the problem:
- Power Supply Check:
- Ensure that the RV or the power source supplying electricity to the Coleman Mach AC is providing sufficient power.
- Check for tripped circuit breakers or blown fuses in the RV’s electrical panel.
- Thermostat Settings:
- Verify that the thermostat settings are correct. Ensure that the temperature is set lower than the current room temperature and that the mode (cooling) is selected.
- Thermostat Power:
- Confirm that the thermostat has power. Some models may use batteries, so check and replace them if needed.
- Air Filter Inspection:
- A clogged or dirty air filter can restrict airflow and impact the AC’s performance. Check and clean or replace the air filter in accordance with the Coleman Mach AC’s guidelines.
- Capacitor Inspection:
- Inspect the capacitor for any signs of damage or malfunction. Faulty capacitors can prevent the AC from starting. Consult the Coleman Mach AC manual for capacitor location and replacement instructions.
- Check for Tripped GFCI Outlet:
- If the Coleman Mach AC is connected to a GFCI (Ground Fault Circuit Interrupter) outlet, make sure it hasn’t tripped. Reset the GFCI if necessary.
- Voltage Issues:
- Ensure that the voltage supplied to the Coleman Mach AC is within the specified range. Voltage fluctuations can impact the unit’s performance.
- Inspect Wiring:
- Examine the wiring for any visible damage, loose connections, or burnt areas. Pay special attention to the connections at the AC unit, thermostat, and power source.
- Reset the AC Unit:
- Turn off the Coleman Mach AC unit and disconnect power for a few minutes. Reconnect the power and turn the unit back on. This simple reset may resolve issues related to electronic components.
- Professional Assistance:
- If the Coleman Mach AC still doesn’t turn on after performing the above steps, consider seeking professional assistance. There may be internal issues with components that require specialized knowledge and tools.
Not working
If your Coleman Mach AC is not working, there could be several reasons for the issue. Here’s a step-by-step troubleshooting guide to help you identify and potentially resolve the problem:
- Check Power Supply:
- Ensure that the RV is properly connected to a power source, and there are no issues with the electrical supply.
- Verify that the circuit breaker for the Coleman Mach AC is not tripped. If it is, reset it.
- Thermostat Settings:
- Confirm that the thermostat is set to a temperature lower than the current room temperature.
- Check if the mode (cooling) and fan settings are selected correctly on the thermostat.
- Air Filter:
- Inspect the air filter on the Coleman Mach AC unit. A dirty or clogged filter can restrict airflow and reduce cooling efficiency. Clean or replace the filter if necessary.
- Condenser Coils:
- Check the condenser coils on the external unit for dirt, debris, or obstructions. Clean the coils with a soft brush or compressed air to enhance heat exchange.
- Refrigerant Levels:
- Low refrigerant levels can affect the AC’s cooling performance. If you suspect a refrigerant issue, it’s advisable to contact a professional technician to inspect and recharge the system.
- Fan Motor:
- Inspect the fan motor for any signs of damage or irregularities. If the fan is not running, it could be a motor or capacitor issue. A qualified technician may be needed for further diagnosis and repair.
- Capacitor:
- Check the capacitor for signs of damage, bulging, or leaking. Faulty capacitors can lead to issues with the AC’s compressor or fan motor. If you’re unfamiliar with electrical components, seek professional assistance.
- Voltage Issues:
- Ensure that the Coleman Mach AC is receiving the correct voltage. Voltage fluctuations or irregularities can impact the performance of the air conditioner.
- Wiring Connections:
- Inspect the wiring connections for loose or damaged wires. Tighten any loose connections and replace damaged wires if necessary.
- Reset the System:
- Turn off the Coleman Mach AC at the thermostat and disconnect power for a few minutes. Reconnect power and turn the system back on. This can sometimes reset the electronics and resolve minor issues.
- Professional Assistance:
- If the troubleshooting steps above do not resolve the problem, it’s recommended to contact a certified RV technician or the Coleman customer support for further assistance. They can provide expert diagnosis and address more complex issues.
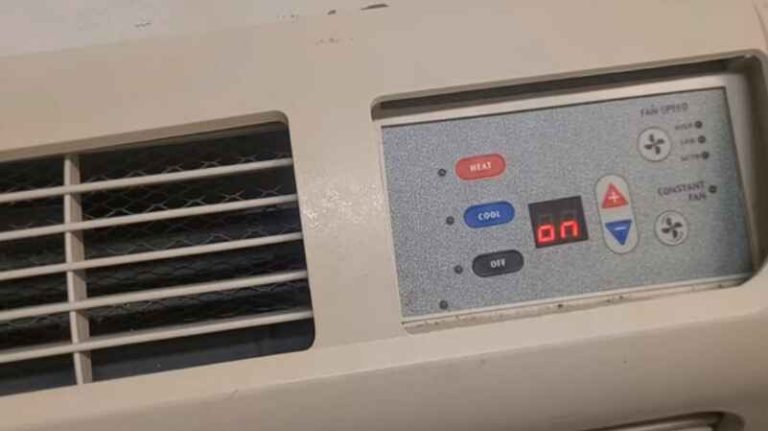
Reset button
If you’re experiencing issues with your Coleman Mach AC unit and need to troubleshoot, one potential solution involves checking and using the reset button. Follow these steps:
- Locate the Reset Button:
- The reset button on a Coleman Mach AC unit is typically found on the control panel. This panel is usually accessible by removing the unit’s cover or by opening a service door.
- Power Off the AC Unit:
- Before attempting any resets, ensure that the Coleman Mach AC unit is powered off. This may involve turning off the thermostat and disconnecting the power supply.
- Identify the Reset Button:
- Look for a small button labeled “Reset” on the control panel. It might be recessed and require a tool like a pen or paperclip to press.
- Press and Hold the Reset Button:
- Press and hold the reset button for about 5-10 seconds. This action is intended to reset the AC unit and clear any potential issues that might be causing malfunctions.
- Power On the AC Unit:
- After releasing the reset button, turn the Coleman Mach AC unit back on. You can do this by restoring power to the unit and adjusting the thermostat settings.
- Monitor for Changes:
- Observe the AC unit’s behavior to see if the reset resolved the issue. Check for proper cooling, airflow, and any unusual sounds.
- Check for Tripped Circuit Breakers:
- If the reset doesn’t resolve the problem, inspect the circuit breakers in your RV or wherever the AC unit is installed. Ensure that none of them have tripped, and if they have, reset them.
- Inspect for Other Issues:
- If the problem persists, there may be other issues with the Coleman Mach AC unit, such as a faulty capacitor, compressor problems, or issues with the thermostat. In such cases, it might be necessary to consult the user manual for further troubleshooting guidance or seek professional assistance.
Short cycling
Troubleshooting Coleman Mach AC short cycling issues involves a systematic approach to identify and address potential causes. Here’s a step-by-step guide:
- Check Air Filter: Ensure that the air filter in the Coleman Mach AC unit is clean and not clogged. Restricted airflow can lead to short cycling as the system struggles to maintain the desired temperature.
- Thermostat Settings: Verify the thermostat settings on your Coleman Mach AC unit. Make sure the temperature settings are appropriate, and the fan mode is set to “Auto” rather than “On.” Incorrect thermostat settings can cause the AC to cycle more frequently than necessary.
- Refrigerant Levels: Check the refrigerant levels in the Coleman Mach AC unit. Low refrigerant levels can result in inefficient cooling and cause the system to short cycle. If you suspect a refrigerant issue, it’s advisable to consult a professional technician for inspection and recharge if necessary.
- Examine Ductwork and Vents: Inspect the ductwork and vents for any obstructions or blockages. Ensure that the vents are open and free from debris, allowing proper airflow throughout the system.
- Condenser Coils: Clean the condenser coils on the outdoor unit of the Coleman Mach AC. Accumulated dirt and debris on the coils can hinder heat exchange, leading to short cycling. Regular cleaning can improve the efficiency of the unit.
- Check for Leaks: Inspect the AC unit for any visible refrigerant leaks. If you notice oil stains or signs of leakage, it’s crucial to address the issue promptly. Refrigerant leaks can affect the performance of the system and contribute to short cycling.
- Temperature Sensor Calibration: Ensure that the temperature sensor or thermostat is calibrated correctly. An incorrectly calibrated sensor can cause the AC to turn on and off unnecessarily. Consult the user manual for instructions on calibrating the thermostat or seek professional assistance.
- Electrical Connections: Examine the electrical connections and wiring of the Coleman Mach AC unit. Loose or damaged connections can lead to intermittent operation. Turn off the power before inspecting and, if necessary, tighten or replace any problematic connections.
- Check for Ice Buildup: If the AC unit has been running continuously, check for ice buildup on the evaporator coils. Ice accumulation can impede proper airflow and cause short cycling. Allow the ice to melt before restarting the unit.
- Professional Inspection: If the short cycling issue persists after performing these troubleshooting steps, it’s advisable to seek the expertise of a qualified HVAC professional. They can conduct a comprehensive inspection, identify underlying issues, and perform any necessary repairs or adjustments to restore the proper function of your Coleman Mach AC unit.
Tripping breaker
If your Coleman Mach AC unit is consistently tripping the breaker, there are several potential issues that you can investigate and troubleshoot. Here are some steps you can take to identify and resolve the problem:
- Electrical Supply:
- Ensure that the AC unit is receiving an adequate power supply. Check the voltage and amperage to ensure they match the specifications outlined in the Coleman Mach AC unit manual.
- Overloaded Circuit:
- Make sure that the circuit the AC unit is connected to is not overloaded with other appliances. The Coleman Mach AC may draw a significant amount of power, so it’s essential to have a dedicated circuit or one with sufficient capacity.
- Circuit Breaker Issues:
- Inspect the circuit breaker itself for any signs of damage or wear. If the breaker is old or shows signs of overheating, it might be malfunctioning. Consider replacing the breaker with one that matches the specifications recommended for the Coleman Mach AC.
- AC Unit Capacitor:
- Check the capacitor in the Coleman Mach AC unit. A faulty capacitor can cause the compressor to draw excessive current, leading to a tripped breaker. If you are not familiar with capacitors, it’s advisable to consult a professional technician to handle this component.
- Compressor Issues:
- Examine the compressor for any visible damage or irregularities. Issues with the compressor can lead to electrical imbalances and cause the breaker to trip. If you notice any problems, it’s recommended to contact a qualified technician for further inspection and potential repairs.
- Wiring Problems:
- Inspect the wiring connecting the AC unit to the power source. Loose or damaged wires can create resistance, leading to increased current draw and tripping the breaker. Ensure all connections are secure and undamaged.
- Thermostat Settings:
- Check the thermostat settings to ensure they are configured correctly. An incorrect setting, such as a too low or too high temperature, may cause the AC unit to overwork and trip the breaker.
- Airflow Issues:
- Verify that the air filters and vents are clean and not obstructed. Poor airflow can cause the AC unit to work harder, potentially leading to overheating and tripping the breaker.
- Refrigerant Levels:
- Insufficient refrigerant levels can also strain the AC system, causing it to draw more power than usual. If you suspect a refrigerant issue, it’s best to consult with a professional HVAC technician.
When to Seek Professional Help
When it comes to troubleshooting Coleman Mach AC problems, there are certain signs that indicate when it’s time to seek professional help. The Coleman Mach AC unit is a complex system, and attempting to address certain issues without the expertise of a certified technician may lead to further complications. Here are some key signs that suggest the need for professional assistance:
A. Signs that the issue may require professional assistance:
- Complex Electrical Problems:
- Coleman Mach AC units involve intricate electrical systems that can be challenging to diagnose and repair for individuals without specialized knowledge. If you encounter electrical issues such as power fluctuations, tripped breakers, or malfunctions in the control panel, it’s advisable to seek the expertise of a Coleman Mach AC certified technician.
- Refrigerant Leaks:
- Refrigerant leaks can pose a serious threat to both the efficiency and safety of your Coleman Mach AC unit. Addressing refrigerant-related problems requires specific skills and tools. Certified technicians are trained to handle refrigerant safely, ensuring that the system is recharged properly and leaks are repaired without compromising performance.
- In-Depth Component Issues:
- The Coleman Mach AC system consists of various components working together seamlessly. If there are problems with specific components such as the compressor, evaporator, or condenser, a certified technician is equipped to perform a thorough diagnosis and determine the most effective solution. Attempting to fix complex component issues without proper knowledge may result in further damage.
B. Importance of Hiring Certified Technicians:
Hiring a certified technician for Coleman Mach AC troubleshooting is crucial for several reasons:
- Specialized Knowledge:
- Certified technicians have undergone specific training related to Coleman Mach AC systems. They possess in-depth knowledge of the unit’s design, functionality, and common issues, enabling them to diagnose problems accurately and efficiently.
- Safety Compliance:
- Working with HVAC systems involves potential safety hazards, especially when handling refrigerants and dealing with electrical components. Certified technicians adhere to safety standards, ensuring that repairs are conducted with the utmost care and compliance.
- Manufacturer Warranty Considerations:
- Attempting DIY repairs or hiring non-certified individuals may void the manufacturer’s warranty. Certified technicians are often authorized by the manufacturer, allowing you to maintain the warranty coverage for your Coleman Mach AC unit.
Preventive Maintenance for Coleman Mach AC Units
Maintaining your Coleman Mach AC units is crucial to ensure optimal performance and extend the lifespan of the equipment. Implementing a comprehensive preventive maintenance plan is essential, and here are key components to include:
A. Regular Cleaning and Filter Replacement:
- Air Filters: Replace or clean the air filters regularly, ideally every 1-3 months depending on usage. This ensures that the Coleman Mach AC unit operates with maximum efficiency by allowing proper airflow.
- Coil Cleaning: Clean the evaporator and condenser coils annually to prevent dirt and debris buildup. Use a soft brush or a vacuum cleaner to remove accumulated dust, as this can impede the unit’s performance.
B. Scheduled Professional Inspections:
- Annual Inspections: Arrange for a professional HVAC technician to conduct a thorough inspection of your Coleman Mach AC unit at least once a year. They can identify and address potential issues before they escalate.
- Refrigerant Levels: Ensure that the refrigerant levels are checked and adjusted as needed during professional inspections. Proper refrigerant levels are vital for efficient cooling.
C. Seasonal Maintenance Checklist:
- Spring Preparation: Before the cooling season begins, inspect the entire unit for any signs of damage or wear. Clean the coils and check for leaks. Verify that the thermostat is functioning correctly.
- Summer Operation: During the peak of the cooling season, regularly monitor the performance of the Coleman Mach AC unit. Keep the area around the unit clear of debris to promote adequate airflow.
- Fall Shutdown: As the cooling season winds down, clean the coils again and cover the outdoor unit to protect it from winter weather. Additionally, inspect the unit for any wear and tear.
Remember to document all maintenance activities and keep a record of professional inspections. This documentation can be valuable for warranty purposes and may aid technicians in diagnosing issues efficiently.
Conclusion
In conclusion, mastering Coleman Mach AC troubleshooting problems is key to ensuring optimal performance and comfort in your RV. By addressing common issues promptly, such as inadequate cooling or strange noises, you can extend the lifespan of your Coleman Mach AC unit. Regular maintenance, including cleaning filters and checking electrical connections, goes a long way in preventing potential problems. Remember, a well-maintained Coleman Mach AC not only enhances your RV experience but also contributes to a stress-free journey. Stay cool, stay informed, and let your Coleman Mach AC be the reliable companion on your road adventures.
One Comment