To address the issue of American Standard AC not turning on, check the thermostat settings, inspect the circuit breaker for any tripped switches, and ensure the air filter is clean. If the problem persists, consult a professional HVAC technician for assistance.
If you’re experiencing the frustration of your American Standard AC not turning on, we understand how uncomfortable that can be. In this troubleshooting guide, we will provide you with tips and solutions to get your AC back up and running. Whether you’re facing an AC that won’t start, isn’t working, or simply won’t power on, we’ve got you covered.
Our troubleshooting tips for AC not turning on will help you diagnose and fix the issue yourself, or determine when it’s time to call in a professional. We’ll cover common reasons for American Standard AC not turning on and provide step-by-step solutions. With our guidance, you’ll be one step closer to a comfortably cooled home.
Possible Causes for AC Not Turning On

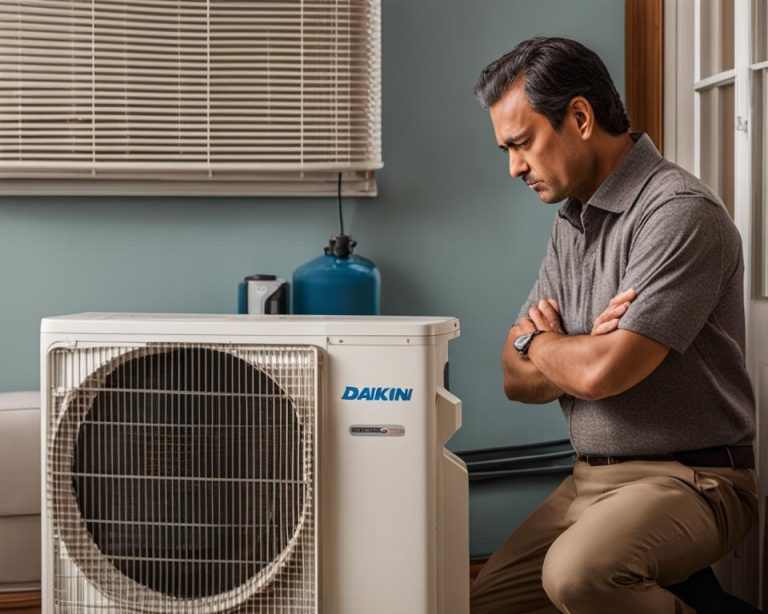
If your American Standard AC is not turning on, there could be several possible causes. Identifying the root cause is crucial in troubleshooting and resolving the issue. Here are some common problems that may prevent your AC from turning on:
- Dead Batteries: Check if the thermostat batteries are dead or low. Low battery power can prevent the AC from starting.
- Clogged Filter: A dirty or clogged air filter can restrict airflow and put strain on your AC system, sometimes leading to a failure to turn on.
- Clogged AC Drain Line: Over time, the drain line of your AC can become clogged with dirt, mold, or debris. This can cause water to accumulate and trigger a safety switch that prevents the AC from turning on.
- Motor Failure: A malfunctioning motor can prevent the AC from starting. Motor failure may be due to wear and tear, electrical issues, or other internal problems.
In some cases, these issues can be resolved with simple DIY solutions. However, for more complex problems like motor failure, it’s best to seek professional assistance.
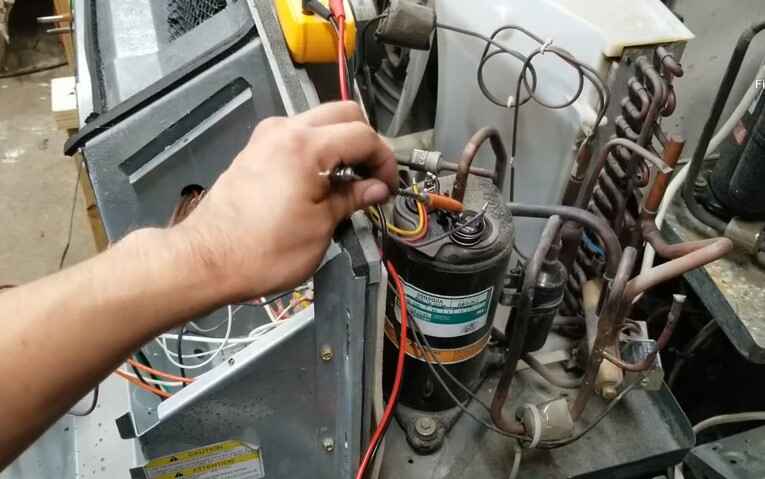
Here is an image that illustrates the possible causes for an AC not turning on:
Understanding these possible causes will enable you to narrow down the problem and take appropriate steps to fix or seek professional assistance in resolving the issue. Let’s move on to Section 3 to explore the troubleshooting steps for an AC not turning on.
Troubleshooting Steps for AC Not Turning On

When your AC is not turning on, it can be frustrating and uncomfortable. However, there are a few troubleshooting steps you can take to help identify and resolve the issue. By following these steps, you may be able to get your AC working again without the need for professional assistance.
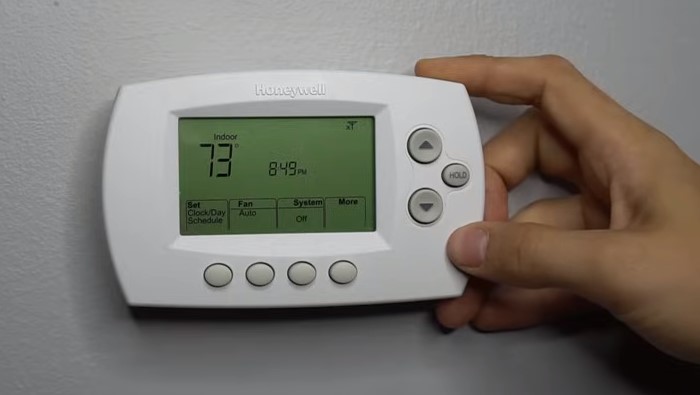
1. Check the Thermostat
The first step is to check your thermostat and ensure it is set to the desired temperature. Sometimes, the thermostat settings can prevent the AC from turning on. Additionally, make sure that the thermostat has working batteries. If the batteries are dead, replacing them may solve the issue.
2. Change Thermostat Batteries
If the thermostat batteries are low or dead, the AC may not receive the signal to turn on. To change the thermostat batteries, follow these steps:
- Locate the battery compartment on the back or side of the thermostat.
- Remove the old batteries and properly dispose of them.
- Insert fresh batteries into the compartment, ensuring the correct polarity.
- Close the battery compartment.
3. Check the Air Filter
A clogged air filter can restrict airflow and prevent the AC from functioning properly. To check the air filter:
- Locate the air filter, usually found near the return air grille or the air handler unit.
- Remove the air filter from its housing.
- Inspect the filter for dust, dirt, or debris. If it appears dirty or clogged, it’s time to replace it.
- Insert a new, clean air filter into the housing.
- Secure the filter in place.
4. Contact an HVAC Technician
If your AC is still not turning on after performing the above troubleshooting steps, it may be time to contact a qualified HVAC technician. They will have the expertise to diagnose and resolve more complex issues that could be preventing your AC from functioning properly.
| Troubleshooting Steps for AC Not Turning On |
|---|
| 1. Check the thermostat and ensure it has working batteries. |
| 2. Change the thermostat batteries if they are low or dead. |
| 3. Check the air filter and replace it if necessary. |
| 4. Contact an HVAC technician for professional assistance. |
AC Not Blowing Cold Air
If your American Standard AC is not blowing cold air, it can be a frustrating experience, especially during hot summer months. There are several potential reasons for this issue that you can investigate before reaching out to a professional. Let’s explore some troubleshooting steps to help you get your AC back to its cooling glory.
Check Thermostat Settings
One of the first things you should do is to check your thermostat settings. Ensure that it is set to the desired temperature and that it is set to the cooling mode. Sometimes, a simple adjustment to the thermostat can solve the problem.
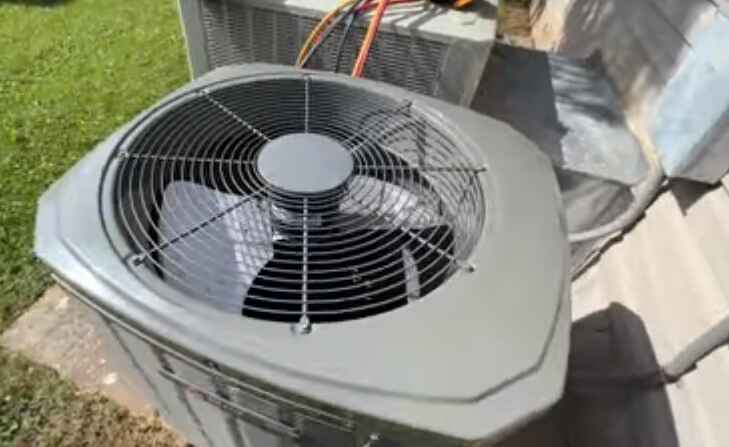
Inspect Outdoor Unit Operation
The outdoor unit plays a crucial role in cooling your home. Check if the outdoor unit is running properly. Pay attention to any strange noises or vibrations coming from the unit. If you notice any issues, it’s best to contact a professional for further inspection.
Broken AC Compressor or Leaking Refrigerant
If the previous troubleshooting steps didn’t resolve the issue, it could be due to a broken AC compressor or a refrigerant leak. The AC compressor is responsible for cooling the air, and if it’s faulty, your AC may fail to blow cold air. Similarly, a refrigerant leak can also impact cooling efficiency. Both of these issues require professional assistance to diagnose and repair.
Remember, attempting to repair a broken AC compressor or fix a refrigerant leak without proper knowledge and equipment can be dangerous. It’s always best to reach out to an HVAC professional to handle these intricate repairs.
By following these troubleshooting steps and seeking professional help when needed, you can address the issue of your American Standard AC not blowing cold air and restore comfort to your home.
| Possible Causes for AC Not Blowing Cold Air | Solutions |
|---|---|
| Thermostat settings not adjusted correctly | Double-check and adjust the thermostat settings to the desired cooling temperature |
| Issues with the outdoor unit | Contact an HVAC professional to inspect and repair any problems with the outdoor unit |
| Broken AC compressor | Seek professional assistance to diagnose and fix a broken AC compressor |
| Refrigerant leak | Contact an HVAC technician to identify and repair any refrigerant leaks |
Troubleshooting Steps for AC Not Blowing Cold Air

If your AC is not blowing cold air, it can be frustrating, especially during hot summer months. Don’t worry, we’re here to help you troubleshoot the issue. Follow these steps to pinpoint and potentially resolve the problem before contacting an HVAC technician.
Step 1: Check Thermostat Settings
Start by checking your thermostat settings. Ensure that the temperature is set lower than the current room temperature. If the thermostat is set too high, the AC may not blow cold air. Adjust the settings as needed and observe if it makes a difference.
Step 2: Check the Outdoor Unit
The outdoor unit plays a crucial role in cooling the air before it enters your home. Check if the outdoor unit is running. Listen for any unusual noises or vibrations. If it’s not operating, there may be a problem with the electrical connection or the fan motor. Contact an HVAC technician for further inspection and repair.
Step 3: Clear Obstructions
Inspect the outdoor unit for any obstructions such as leaves, debris, or vegetation. These obstructions can hinder airflow and reduce cooling efficiency. Clear any debris around the unit to ensure optimal performance.
Step 4: Clean or Replace Air Filters
Clogged or dirty air filters can restrict airflow, resulting in reduced cooling capacity. Check your air filters and clean or replace them if necessary. Clean filters can improve airflow and help your AC blow colder air.
Step 5: Contact an HVAC Technician
If you have followed the previous troubleshooting steps and your AC is still not blowing cold air, it’s time to contact an HVAC technician. They have the expertise and tools to diagnose the problem accurately and provide the necessary repairs or maintenance.
Remember, attempting complex repairs without proper knowledge and experience can lead to further damage or voiding your AC’s warranty. It’s always best to seek professional assistance when in doubt.
| Steps | Description |
|---|---|
| Step 1 | Check Thermostat Settings |
| Step 2 | Check the Outdoor Unit |
| Step 3 | Clear Obstructions |
| Step 4 | Clean or Replace Air Filters |
| Step 5 | Contact an HVAC Technician |
AC Continuously Running/Won’t Turn Off

If your American Standard AC is continuously running and won’t turn off, it can be a cause for concern. There are several potential factors that can contribute to this issue.
First, a faulty thermostat could be the culprit. The thermostat is responsible for sensing the temperature and signaling the AC unit to turn on or off accordingly. If the thermostat is malfunctioning, it may not be sending the correct signals, causing the AC to run continuously.
Another possible reason for the AC continuously running is an incorrect system size. If the AC unit is too small for the space it is intended to cool, it may struggle to reach the desired temperature, resulting in continuous operation.
External factors can also play a role in AC behavior. High temperatures, especially during hot summer days, can cause the AC to work harder to cool the space, leading to continuous operation. Additionally, poor insulation or air leaks in the home can make it difficult for the AC to maintain the desired temperature, causing it to run constantly.
To troubleshoot the issue of your AC continuously running and not turning off, start by checking the thermostat. Ensure that it is set to the desired temperature and functioning correctly. If the thermostat seems to be the problem, you may need to replace it.
If the thermostat is functioning properly, consider the size of your AC unit. Consult with an HVAC professional to determine if the system is appropriately sized for your home. If the unit is too small, you may need to upgrade to a larger system to adequately cool your space.
If external factors, such as high temperatures or poor insulation, are contributing to your AC running continuously, there are steps you can take to address these issues. Use insulation to seal any air leaks and improve the efficiency of your cooling system. Consider implementing energy-saving measures, such as installing window coverings or using fans to circulate air in your home.
In some cases, troubleshooting the AC continuously running issue may require the expertise of an HVAC professional. They can assess the specific circumstances of your air conditioning system and provide appropriate recommendations or repairs.
Remember, a continuously running AC not only affects comfort but can also lead to increased energy consumption and higher utility bills. Addressing the issue promptly can help restore efficiency and save on energy costs.
| Possible Causes for AC Continuously Running/Won’t Turn Off | Solutions |
|---|---|
| Faulty thermostat | Replace the thermostat |
| Incorrect system size | Consult with an HVAC professional to determine if the system needs to be upgraded |
| High temperatures | Use energy-saving measures to reduce heat gain in the home |
| Poor insulation or air leaks | Seal air leaks and improve insulation in the home |
| System malfunction | Contact an HVAC professional for further assessment and repairs |
Troubleshooting Steps for AC Continuously Running/Won’t Turn Off

If your American Standard AC is continuously running and won’t turn off, there are a few troubleshooting steps you can take to resolve the issue. By following these steps, you can potentially avoid the need to contact an HVAC professional and save time and money.
- Check the thermostat settings: Ensure that your thermostat is set to the appropriate temperature and mode. Sometimes, incorrect settings can cause the AC to keep running. Adjust the temperature or switch to a different mode to see if it makes a difference.
- Adjust the temperature: If the thermostat settings seem correct, try adjusting the temperature by a few degrees. It’s possible that the current temperature setting is not triggering the AC to turn off. Make the adjustment and monitor if it resolves the issue.
- Check the system size: An AC unit that is too small for your home’s cooling needs may struggle to reach the desired temperature, leading to continuous operation. Verify that the system size is appropriate for the square footage of your living space. If it’s not, you may need to consider upgrading to a larger unit.
- Contact an HVAC professional: If none of the troubleshooting steps mentioned above resolve the issue, it’s time to reach out to an HVAC professional. They have the expertise and tools to identify and fix more complex problems with your AC system. They can assess the situation, diagnose any underlying issues, and provide the necessary repairs or adjustments.
Remember, troubleshooting steps can vary depending on the specific model and configuration of your American Standard AC. If you’re unsure or uncomfortable performing any of these steps, it’s best to contact a professional technician to avoid any potential risks or further damage to your system.
| Troubleshooting Steps for AC Continuously Running/Won’t Turn Off |
|---|
| 1. Check the thermostat settings |
| 2. Adjust the temperature |
| 3. Check the system size |
| 4. Contact an HVAC professional |
Note: These troubleshooting steps are meant as general guidelines. Always refer to the manufacturer’s instructions or consult with an HVAC professional for specific guidance based on your American Standard AC model.
Signs it’s Time for AC Replacement

Is your American Standard AC showing signs of wear and tear? If you’re experiencing frequent repairs, strange noises and smells, or skyrocketing energy bills, it may be time to consider replacing your old air conditioner. Here are some indicators to help you determine if it’s time for an upgrade:
- Age: Is your AC unit over 20 years old? As air conditioners age, their efficiency and performance tend to decline, leading to higher energy consumption and less effective cooling.
- Frequent Repairs: Are you constantly calling for repairs or experiencing recurring issues with your AC? Frequent repairs can be a sign that your unit is reaching the end of its lifespan and may not be worth the cost of continued maintenance.
- Strange Noises and Smells: Does your air conditioner emit unusual noises, such as grinding, squealing, or banging sounds? Are there unpleasant smells coming from the unit? These could be indications of internal problems that are best addressed with a replacement.
- High Energy Bills: Have you noticed a significant increase in your energy bills despite no changes in usage? An inefficient, outdated AC can consume more energy, resulting in higher monthly expenses. Upgrading to a newer, energy-efficient model can help lower your utility costs.
Replacing your old air conditioner with a new American Standard AC can not only improve your comfort but also save you money in the long run. Consult with an HVAC professional to assess the state of your current unit and recommend the best replacement options.
Preventing AC Issues
Regular maintenance and simple steps can go a long way in preventing AC issues and ensuring the optimal performance of your American Standard AC. By prioritizing regular maintenance and taking some preventive measures, you can minimize the chances of encountering AC problems in the future.
Regular Maintenance
One of the keys to preventing AC issues is to schedule regular maintenance for your American Standard AC. It is recommended to have professional maintenance performed at least twice a year, ideally before the start of the cooling and heating seasons. During these maintenance visits, an HVAC technician can inspect your AC system, clean any dirt or debris, and identify any potential issues before they become major problems.
Changing Air Filters
Another important preventive measure is to change your air filters regularly. Clogged or dirty air filters can restrict airflow, strain your AC system, and even lead to breakdowns. It is advisable to check your air filters every month and replace them if they appear dirty or clogged. By maintaining clean and unclogged air filters, you can ensure proper airflow and improve your AC system’s efficiency.
Clearing Debris
Clearing debris around your AC unit is also crucial in preventing issues. Accumulated leaves, grass, or any other debris can obstruct airflow, strain the system, and reduce its efficiency. Therefore, regularly check and clear any debris around the outdoor unit of your American Standard AC to allow for unrestricted airflow and optimal performance.
Scheduling Professional Maintenance
In addition to regular maintenance, it’s essential to schedule professional maintenance with an HVAC technician. A professional can inspect your AC system thoroughly, identify any potential issues, and perform any necessary repairs or adjustments. By having a trained professional assess your system, you can be confident that your American Standard AC is in good hands and functioning optimally.
By following these preventive measures, including regular maintenance, changing air filters, clearing debris, and scheduling professional maintenance, you can significantly reduce the likelihood of AC issues. It’s always better to be proactive and take preventive measures than to deal with unexpected breakdowns and expensive repairs.
Possible Causes and Solutions for Other AC Issues
In addition to the common issues discussed earlier, there are other AC issues that you may encounter. These include AC not turning off, lack of airflow, air conditioner leaks, and strange noises coming from the vents. Each of these problems has its own possible causes and solutions, which may require professional assistance.
AC Not Turning off
If your AC is not turning off, there could be a few potential causes. It might be due to a faulty thermostat or a wiring issue. Additionally, your AC unit may be oversized for the space it’s cooling, causing it to struggle to reach the desired temperature. To address this problem, it’s best to contact an HVAC professional who can accurately diagnose the issue and provide appropriate solutions.
Lack of Airflow
A lack of airflow from your AC vents can be caused by various factors. One common cause is a clogged air filter that restricts the flow of air. In addition, blocked or closed vents, dirty coils, or a malfunctioning blower fan can also contribute to this issue. To solve this problem, start by checking and replacing the air filter if needed. If the issue persists, contact an HVAC technician for a thorough inspection and cleaning.
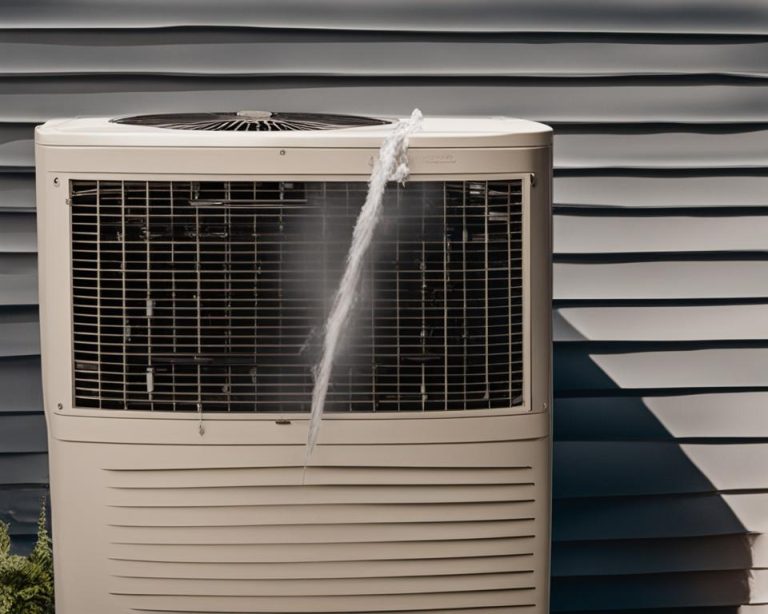
Air Conditioner Leaks
If you notice water or refrigerant leaks from your air conditioner, it’s important to address them promptly. Leaks can be caused by a clogged condensate drain line, a refrigerant leak, or a malfunctioning condensate pump. A professional HVAC technician can safely diagnose and repair the source of the leak to prevent further damage and ensure efficient operation of your AC system.
Strange Noises from Vents
If you hear strange noises, such as rattling, buzzing, or squealing, from your AC vents, several factors could be at play. Loose or damaged ductwork, faulty fan motors, or worn-out belts can all contribute to these noises. It’s recommended to have an HVAC professional inspect your system to identify and resolve the issue, preventing any further damage to your AC unit.
Here’s a visually engaging and informative table summarizing the possible causes and solutions for these AC issues:
| AC Issue | Possible Causes | Solutions |
|---|---|---|
| AC Not Turning Off | Faulty thermostat Wiring issues Oversized AC unit | Contact HVAC professional Replace thermostat if necessary Resizing AC unit if required |
| Lack of Airflow | Clogged air filter Blocked or closed vents Dirty coils Malfunctioning blower fan | Check and replace air filter Ensure vents are open and unobstructed Clean coils Inspect and repair blower fan |
| Air Conditioner Leaks | Clogged condensate drain line Refrigerant leak Malfunctioning condensate pump | Clean condensate drain line Repair refrigerant leak Fix or replace condensate pump |
| Strange Noises from Vents | Loose or damaged ductwork Faulty fan motors Worn-out belts | Inspect and tighten ductwork Replace or repair fan motors Replace worn-out belts |
Remember, it’s always best to consult with a professional when dealing with complex AC issues to ensure proper diagnosis and resolution. We’re here to help keep your AC running smoothly and efficiently!
Conclusion
Troubleshooting an American Standard AC that is not turning on can be a frustrating experience. However, by following our comprehensive troubleshooting guide and considering the possible causes we discussed, you can take steps to resolve the issue yourself or determine when it’s necessary to seek professional assistance.
Remember, the troubleshooting process is a process of elimination. Start with the simple steps, such as checking the thermostat and changing the batteries, as well as ensuring the air filter is clean. If these measures don’t fix the problem, it may be time to contact an HVAC professional who can conduct a more thorough diagnosis and offer specific solutions tailored to your AC system.
In order to prevent future AC issues, it’s important to prioritize regular maintenance. This includes scheduling professional maintenance at least twice a year, as well as changing the air filters regularly and clearing any debris around the AC unit. By taking these preventive measures, you can help ensure the optimal performance and longevity of your American Standard AC.

3 Comments