To troubleshoot Amana AC fan not working, check the thermostat settings, ensure proper power supply, and examine the capacitor. If issues persist, consult the user manual or contact Amana customer support for assistance.
Is your Amana AC unit giving you the cold shoulder because its fan has decided to take an unexpected vacation? Don’t sweat it – you’re not alone! Dealing with an Amana AC fan not working can be a breeze with the right guidance. In this beginner-friendly guide, we’ll unravel the mystery behind a non-functioning fan, helping you restore the cool flow in your home. Let’s troubleshoot the issue step by step and get your Amana AC back in the cooling game.
Common signs of a malfunctioning Amana AC fan
A malfunctioning Amana AC fan can lead to inefficient cooling and potential system issues. Here are some common signs to look out for:
1. Lack of Air Circulation:
One of the primary signs that your Amana AC fan is not working properly is a noticeable lack of air circulation in your home. If you find that certain rooms are not receiving cool air or the airflow is weak, it may be indicative of a malfunctioning Amana AC fan.
2. Warm Air Blowing:
If warm air is being blown out of the vents when the Amana AC is set to cool, it’s a clear indication that the fan is not functioning as it should. This issue could be caused by a malfunction in the fan motor or other related components.
3. Unusual Noises:
An Amana AC fan not working properly may produce unusual or loud noises. Grinding, squealing, or rattling sounds could be signs of a malfunction in the fan motor or issues with the fan blades. If you hear any unusual noises, it’s important to address the problem promptly to prevent further damage.
4. Inconsistent Cooling:
Another sign of a malfunctioning Amana AC fan is inconsistent cooling throughout your home. If certain areas are cooler than others or if the temperature doesn’t reach the desired set point, the fan may be struggling to distribute the conditioned air effectively.
5. AC Unit Not Turning On:
If the Amana AC fan is not working at all, the entire unit may not turn on. Check for power issues, such as a tripped circuit breaker, and ensure that the thermostat settings are correct. If the problem persists, it may be related to a malfunction in the fan motor or capacitor.
6. Fan Runs Continuously:
On the other hand, if the Amana AC fan runs continuously without turning off, it could be a sign of a faulty thermostat or a problem with the fan relay switch. This can lead to excessive wear on the fan motor and reduced overall efficiency.
7. Ice Formation on Coils:
Amana AC fan issues can also manifest as ice formation on the evaporator or condenser coils. Poor airflow caused by a malfunctioning fan can lead to the coils becoming too cold and developing ice, impairing the cooling process.
8. Strange Smells:
A malfunctioning Amana AC fan can result in the buildup of dust and debris on the evaporator coils, leading to unpleasant odors when the unit is running. If you notice musty or moldy smells, it’s essential to address the fan issues promptly.
9. Frequent Cycling On and Off:
If the Amana AC fan is not working correctly, the system may experience frequent cycling on and off. This can put unnecessary strain on the compressor and other components, potentially leading to more significant issues over time.
10. High Energy Bills:
Amana AC fan problems can impact the overall efficiency of the cooling system, causing it to work harder to maintain the desired temperature. This increased strain can result in higher energy bills. If you notice a sudden spike in your electricity costs, it’s worth investigating the performance of your AC fan.
Importance of timely troubleshooting to prevent further damage
Timely troubleshooting of an Amana AC fan not working is crucial for several reasons, emphasizing the importance of addressing the issue promptly to prevent further damage. Here are 10 key reasons why timely troubleshooting is essential:
1. Preventing System Overheating:
Swiftly addressing the Amana AC fan not working ensures that the system doesn’t overheat, safeguarding critical components from potential damage.
2. Avoiding Compressor Strain:
Timely troubleshooting helps prevent excessive strain on the compressor, a key component in the Amana AC system. This can prolong the compressor’s lifespan and overall system efficiency.
3. Energy Efficiency:
A malfunctioning fan can lead to increased energy consumption as the system compensates for the lack of airflow. Quick troubleshooting helps maintain energy efficiency and keeps utility costs in check.
4. Preserving Air Quality:
A properly functioning fan contributes to adequate ventilation, preventing the buildup of indoor air pollutants. Timely troubleshooting ensures that the Amana AC system continues to deliver clean and healthy air.
5. Protecting Electronic Components:
The fan plays a role in cooling electronic components within the Amana AC unit. Rapid troubleshooting prevents these components from potential damage due to overheating.
6. Preventing Ice Formation:
Inadequate airflow caused by a non-functional fan can lead to ice formation on the evaporator coils. Timely intervention avoids this issue, preserving the system’s effectiveness and preventing further damage.
7. Enhancing Comfort:
Addressing the Amana AC fan issue promptly ensures that the cooling system operates optimally, maintaining a comfortable indoor environment for occupants.
8. Avoiding Costly Repairs:
Ignoring a malfunctioning fan can lead to more severe problems within the Amana AC unit, resulting in higher repair costs. Timely troubleshooting helps nip potential issues in the bud, saving on extensive repairs.
9. Extending System Lifespan:
Regular maintenance, including addressing fan issues promptly, contributes to the overall longevity of the Amana AC system, preventing premature wear and tear.
10. Minimizing Downtime:
Quick troubleshooting and resolution of the Amana AC fan problem minimize system downtime, ensuring that occupants are not left without proper cooling for an extended period.
In summary, the timely troubleshooting of an Amana AC fan not working is vital for maintaining system efficiency, preventing further damage, and ensuring a comfortable and healthy indoor environment. Regular attention to such issues can significantly contribute to the longevity and optimal performance of the entire cooling system.
Amana Air Conditioner Fan Not Working: Troubleshooting Problems
Safety Precautions
Dealing with electrical appliances, especially when troubleshooting issues like a non-working AC fan, requires strict adherence to safety precautions. Here are some key points emphasizing the importance of safety and providing tips on turning off the power to ensure a safe working environment:
A. Importance of safety when dealing with electrical appliances:
Electric Shock Hazard:
Electrical appliances, including air conditioners, pose a risk of electric shock. It is crucial to prioritize safety to prevent injuries or fatalities.
Risk of Fire:
Faulty wiring or malfunctioning components can lead to electrical fires. Safety measures are essential to minimize the risk of fire hazards.
Personal Protection:
Always wear appropriate personal protective equipment (PPE), such as insulated gloves and safety goggles, to protect yourself from potential hazards.
Knowledge and Understanding:
Ensure a basic understanding of the electrical system of your AC unit. If you are uncertain about any aspect, it’s best to consult with a qualified technician.
Turn Off Power:
Before attempting any repairs, disconnect the power supply to the AC unit. This can be done at the circuit breaker or the main electrical panel. This step is crucial for your safety and the safety of anyone else nearby.
Qualified Professionals:
If you are unsure about your ability to troubleshoot and repair electrical appliances, it is recommended to seek the assistance of a qualified professional. DIY repairs should only be attempted by those with the necessary knowledge and experience.
B. Tips on turning off the power and ensuring a safe working environment:
Locate the Circuit Breaker:
Identify the circuit breaker that supplies power to your AC unit. It should be clearly labeled in the electrical panel.
Turn Off the Breaker:
Switch off the circuit breaker associated with the AC unit. This will cut off power to the entire unit, ensuring a safe working environment.
Confirm Power Disconnection:
Use a voltage tester to confirm that the power has been successfully disconnected. This additional step helps ensure that there is no electrical current flowing to the AC unit.
Secure the Area:
Keep the area around the AC unit clear of any obstacles. This ensures easy access to the unit and reduces the risk of accidents during the repair process.
Use Insulated Tools:
When working with electrical components, use insulated tools to minimize the risk of electrical shock.
Follow Manufacturer Guidelines:
Refer to the manufacturer’s guidelines for your specific AC unit. These guidelines often contain safety instructions and recommended procedures for maintenance and repairs.
Remember, safety should always be the top priority when dealing with electrical appliances. If you are unsure or uncomfortable with any aspect of the repair process, it is advisable to seek professional assistance.
Preliminary Checks
If the fan in your Amana AC unit is not working, here are some preliminary checks you can perform:
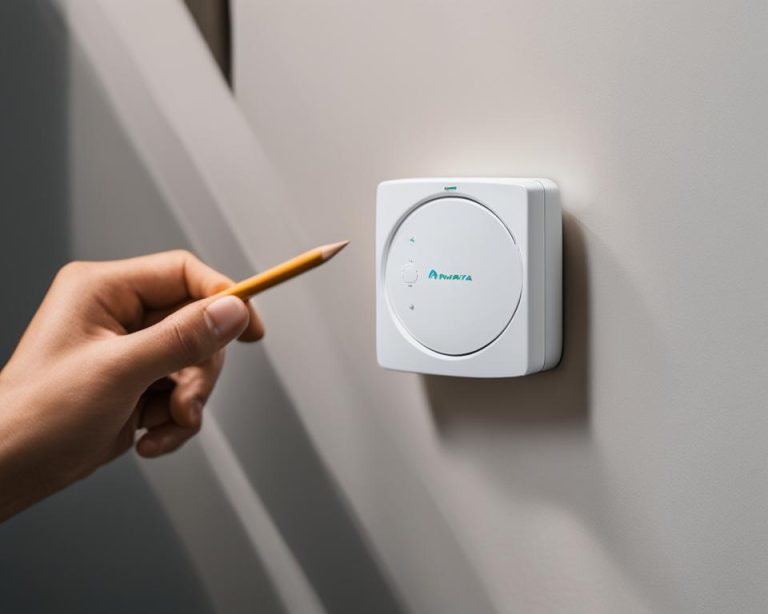
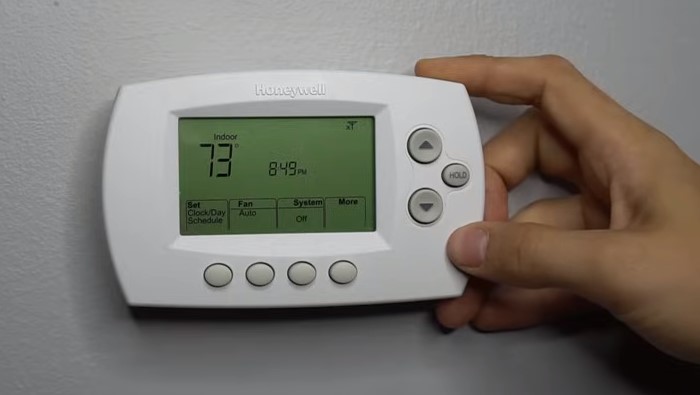
A. Verify Thermostat Settings:
- Ensure that the thermostat is set to the “cool” mode.
- Set the temperature setting lower than the current room temperature to activate the cooling function.
- Check the fan setting on the thermostat. If it’s set to “auto,” switch it to “on” to see if the fan starts running continuously.
B. Confirm Power Supply to the AC Unit:
- Check if the AC unit is plugged in properly. Make sure the power cord is securely connected to the electrical outlet.
- Inspect for any visible damage to the power cord. If you find any, replace the cord.
- Ensure that there is power in the building by checking other electronic devices in the same area.
C. Inspect the Circuit Breaker for Any Tripped Switches:
- Locate the circuit breaker panel for your home or building.
- Check for any tripped switches or fuses associated with the AC unit. Tripped switches are usually in the “off” position and can be reset by switching them to the “on” position.
- If the circuit breaker continues to trip after resetting it, there may be an electrical issue, and you should consult with a professional electrician.
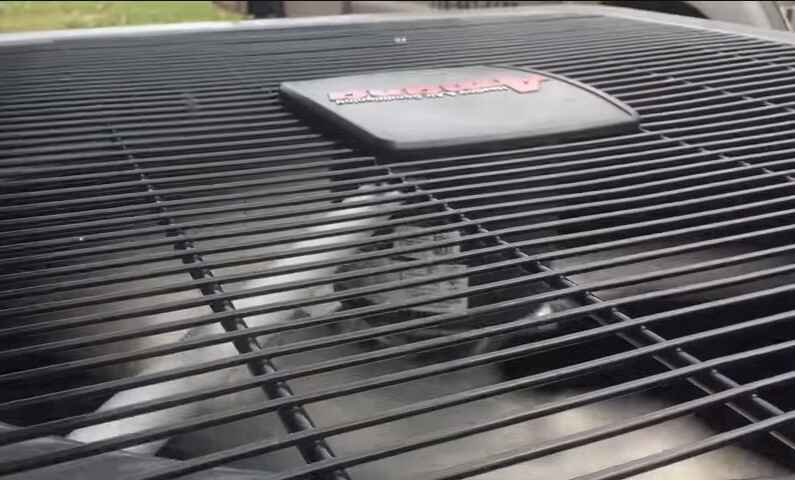
External Obstructions
If your Amana AC fan is not working, external obstructions could be a potential cause. Here are some steps to address this issue:
A. Check for debris around the outdoor unit:
Inspect the area around the outdoor unit for any debris such as leaves, twigs, or other objects.
Remove any debris that may be obstructing the fan blades. This can impede the fan’s ability to rotate and function properly.
B. Clear any vegetation or obstacles:
Trim any vegetation, bushes, or tall grass around the outdoor unit. Ensure there is at least a 2-foot clearance around the unit.
Remove any obstacles or items stored near the unit that could obstruct the airflow. Adequate airflow is crucial for the efficient operation of the AC system.
C. Ensure proper clearance:
Check for proper clearance on all sides of the outdoor unit. Refer to the manufacturer’s guidelines for the recommended clearance distances.
Make sure there are no obstructions above the unit, such as overhanging branches or structures.
By addressing these external obstructions, you can help ensure optimal airflow around the outdoor unit, allowing the AC fan to operate efficiently.
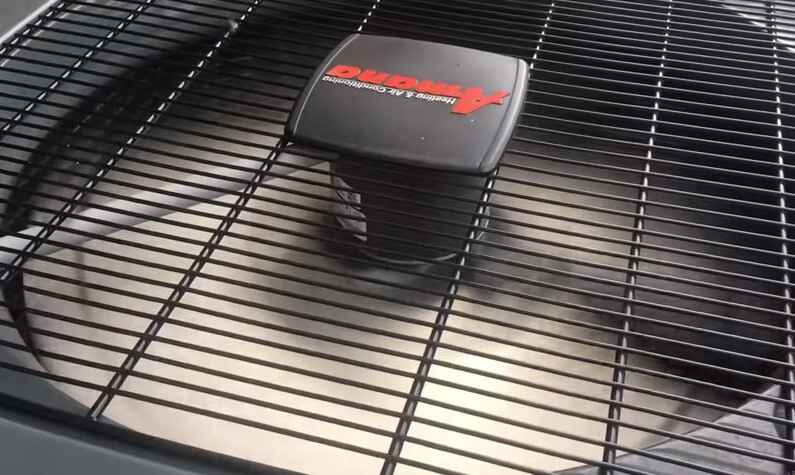
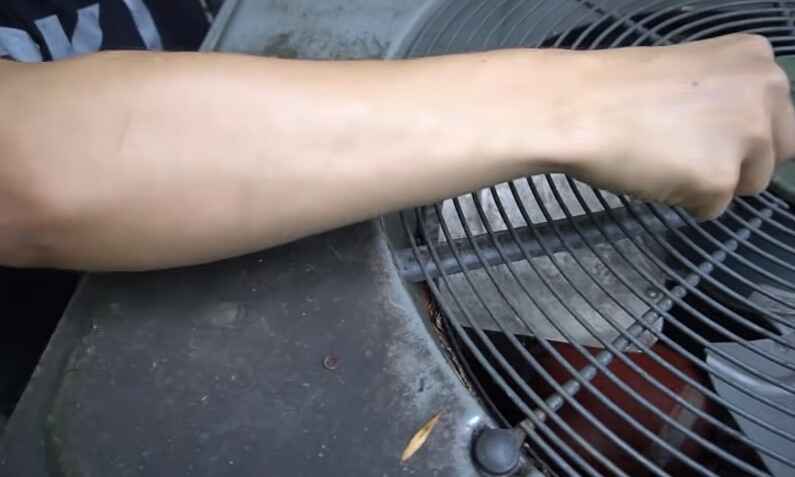
Fan Blade Inspection

If your Amana AC fan is not working, it’s essential to troubleshoot and inspect various components. Here’s a step-by-step guide focusing on fan blade inspection:
A. Examine the fan blades for visible damage or obstruction:
- Turn off the power: Before inspecting the fan blades, ensure that the power to the air conditioner is turned off. You can do this by switching off the circuit breaker or disconnecting the power source.
- Visual inspection: Carefully examine the fan blades for any visible damage, such as cracks or chips. If you notice any damage, the fan blade may need to be replaced.
- Remove obstructions: Check for any debris or objects that may be obstructing the movement of the fan blades. Clear away any leaves, sticks, or other items that could be preventing the blades from turning.
B. Clean blades from accumulated dirt and debris:
- Turn off the power: As a safety precaution, make sure the power to the AC unit is turned off.
- Use a soft brush or compressed air: Gently brush or blow away any accumulated dirt and debris on the fan blades. Be cautious not to damage the blades during cleaning.
- Wipe the blades: If necessary, you can use a damp cloth to wipe the blades clean. Ensure that the blades are completely dry before restoring power.
C. Check for proper alignment of the blades on the shaft:
- Inspect alignment: Visually inspect the alignment of the fan blades on the shaft. They should be straight and evenly spaced. Misalignment can cause the fan to wobble and may lead to issues.
- Tighten loose components: If you notice any loose screws or bolts securing the fan blades to the shaft, tighten them using the appropriate tools. Ensure that everything is securely in place.
After performing these inspections and maintenance steps, you can turn the power back on and test the AC unit to see if the fan is working properly.
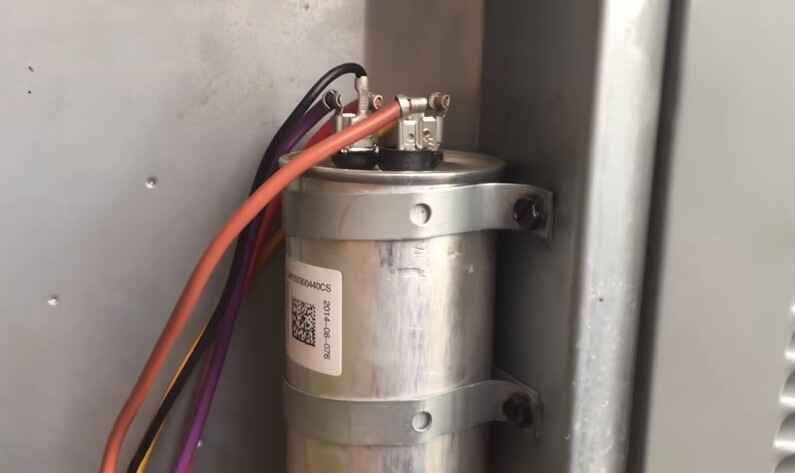
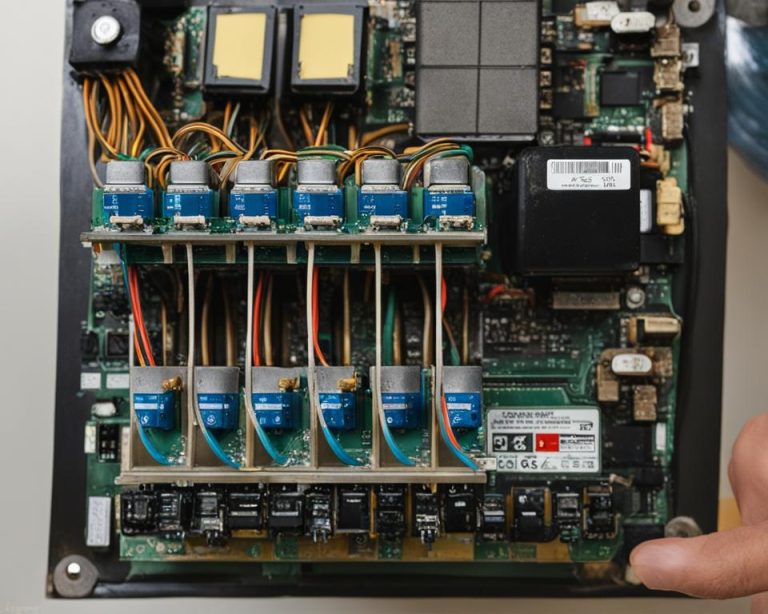
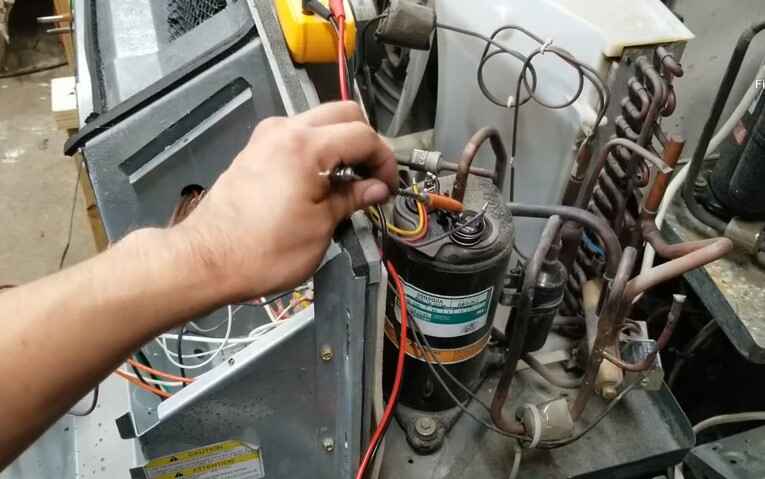
Capacitor Examination
If the fan in your Amana air conditioner is not working, one possible culprit could be a faulty capacitor. If the capacitor is defective, it can prevent the fan from functioning properly.
A. Role of the Capacitor in the Fan’s Operation:
The capacitor in an air conditioner’s fan motor plays a crucial role in starting and running the motor. It stores electrical energy and releases it in bursts to provide the extra power needed for the motor to overcome inertia during startup and maintain a consistent speed during operation. Capacitors are essential for the proper functioning of the fan motor, and if they fail, it can lead to issues like the fan not working or not starting.
B. Steps to Visually Inspect the Capacitor:
Before you start, ensure the power to the AC unit is turned off to avoid any electrical hazards.
1. Locate the Capacitor:
The capacitor is typically a cylindrical component with wires connected to it.
It is often located near the fan motor in the outdoor condenser unit or inside the air handler unit.
2. Visually Inspect for Bulging or Leaks:
Check the capacitor for any signs of physical damage.
A bulging or swollen appearance is a clear sign of capacitor failure.
Look for any oil or fluid leaks, as this could also indicate a problem.
3. Inspect the Wires:
Ensure that the wires connected to the capacitor are in good condition.
Look for any signs of burning, fraying, or damage.
4. Note the Ratings:
Take note of the capacitor’s ratings (in microfarads, μF) and voltage. This information is crucial for purchasing a replacement.
C. Capacitor Replacement if Necessary – Step-by-Step Guide:
If you’ve determined that the capacitor is faulty and needs replacement, follow these steps:
1. Turn Off Power:
Ensure the power to the AC unit is turned off at the breaker box.
2. Discharge the Capacitor:
Use a screwdriver with an insulated handle to short the terminals of the capacitor to discharge any stored electrical energy. Be cautious and use appropriate safety measures.
3. Remove Wires:
Disconnect the wires from the capacitor terminals. Take a picture or make a note of the wire connections for reference during installation.
4. Remove Old Capacitor:
Unscrew or unclamp the capacitor from its mount. Note its position for proper orientation of the replacement.
5. Install New Capacitor:
Place the new capacitor in the same position and secure it in place.
6. Connect Wires:
Connect the wires to the new capacitor according to the reference you made earlier.
7. Turn On Power:
Restore power to the AC unit at the breaker box.
8. Test the Fan:
Turn on the AC and check if the fan is now functioning properly.
If you’re uncomfortable with electrical work or if you’re unsure about any step, it’s recommended to seek professional assistance to ensure safety and proper installation.
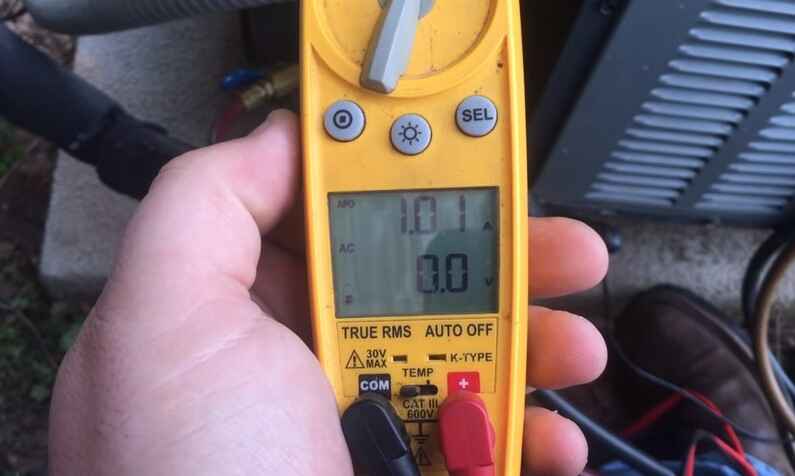
Motor Testing
If the fan on your Amana air conditioner is not working, there are several steps you can take to troubleshoot and potentially identify the issue.
A. Overview of the AC Fan Motor’s Function:
The AC fan motor plays a crucial role in the operation of your air conditioning system by circulating air through the condenser coils to dissipate heat. When the fan motor malfunctions, it can lead to poor cooling performance or even system failure.
B. Guidelines for Testing the Motor Using a Multimeter:
Before you begin testing the AC fan motor, ensure that the power to the unit is turned off to prevent any electrical hazards. Follow these steps to test the motor using a multimeter:
Visual Inspection:
Check for any visible signs of damage, such as burnt wires, loose connections, or physical damage to the motor itself.
Ensure the fan blades can rotate freely without obstruction.
Multimeter Settings:
Set your multimeter to the resistance (ohms) setting.
Testing Motor Windings:
Locate the motor terminals.
Measure the resistance between each pair of terminals (common to start, common to run, start to run).
Compare the readings with the motor’s specifications provided by the manufacturer.
If the readings are significantly different from the specifications, it may indicate a problem with the motor windings.
Checking for Continuity:
Test for continuity between each terminal and the motor’s metal casing.
There should be no continuity. If there is continuity, it suggests a short circuit, and the motor may need replacement.
Capacitor Test (if applicable):
If the AC fan motor is connected to a capacitor, check the capacitor’s condition.
Discharge the capacitor using a screwdriver with an insulated handle.
Measure the capacitance using the multimeter and compare it to the rated capacitance on the capacitor itself. A significant deviation may indicate a faulty capacitor.
C. Troubleshooting Motor Issues and Potential Solutions:
1. No Continuity or High Resistance:
Check for loose or disconnected wires and reconnect as necessary.
If the windings are damaged, the motor may need replacement.
2. Short Circuit (Continuity with Casing):
Inspect for damaged insulation on wires and replace any damaged sections.
If the casing is damaged, consider replacing the motor.
3. Faulty Capacitor:
Replace the capacitor if the capacitance deviates significantly from the specified value.
4. Physical Damage:
If there is physical damage to the motor, such as a bent shaft or broken components, consider replacing the motor.
If you are unsure or uncomfortable performing these tests, it’s recommended to seek professional assistance from a qualified HVAC technician. Additionally, always refer to the manufacturer’s guidelines and specifications for your specific AC unit.
Freon Levels
If the fan in your Amana air conditioner is not working, it’s important to note that the issue may not necessarily be related to the Freon (refrigerant) levels. The fan and the refrigerant system are two separate components in an air conditioner.
A. Importance of Adequate Refrigerant Levels for Optimal AC Performance:
Refrigerant is a crucial component in the air conditioning (AC) system, and its levels play a significant role in ensuring optimal performance. Refrigerant is responsible for absorbing and releasing heat in the cooling cycle. If the refrigerant levels are too low, it can negatively impact the efficiency and effectiveness of the AC system. Adequate refrigerant levels are essential for the following reasons:
1. Heat Absorption and Release:
Refrigerant is the medium that absorbs heat from the indoor air and releases it outside. If the refrigerant levels are insufficient, the AC unit will struggle to absorb enough heat, leading to poor cooling performance.
2. Pressure and Temperature Regulation:
Refrigerant operates within a specific pressure and temperature range to facilitate the heat exchange process. Inadequate refrigerant levels can disrupt this balance, causing the AC system to operate inefficiently and potentially leading to system malfunctions.
3. Compressor Functionality:
The compressor, a vital component of the AC system, relies on the proper amount of refrigerant to function optimally. Low refrigerant levels can lead to compressor overheating, reduced lifespan, and increased energy consumption.
B. How Refrigerant Levels Can Impact the Fan:
The AC fan is responsible for circulating air through the evaporator coil, where the air is cooled before being distributed into the living space. Inadequate refrigerant levels can impact the fan in the following ways:
1. Reduced Cooling Capacity:
Insufficient refrigerant can lead to lower heat absorption in the evaporator coil, resulting in less cool air being circulated by the fan.
2. Icing of Evaporator Coil:
Low refrigerant levels can cause the evaporator coil to become too cold, leading to the formation of ice. This ice restricts the airflow and hampers the fan’s ability to circulate air effectively.
3. Increased Energy Consumption:
When the AC system is low on refrigerant, it may compensate by running longer and working harder to achieve the desired temperature. This increased workload can lead to higher energy consumption and utility bills.
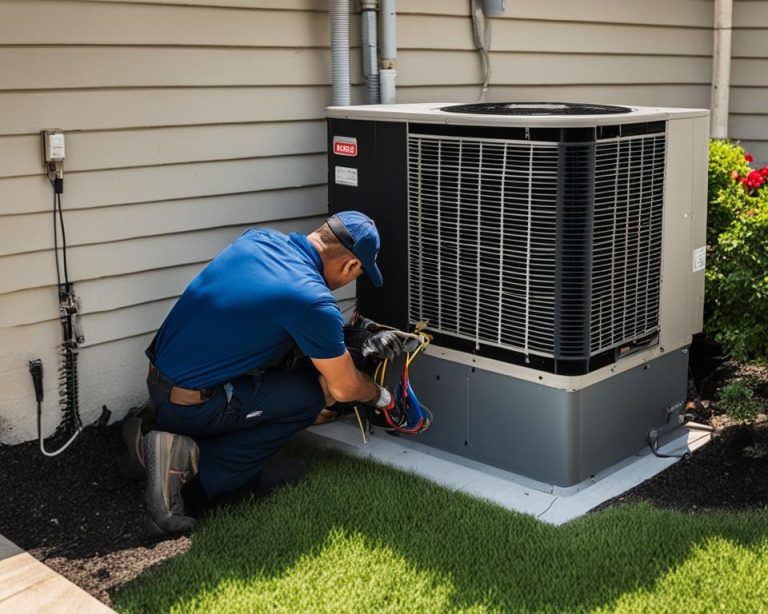
C. Professional Inspection and Recharge If Needed:
If you suspect that your AC fan is not working due to low refrigerant levels, it’s crucial to seek professional help. A qualified HVAC technician can perform a thorough inspection and take the following steps:
1. Refrigerant Leak Detection:
Identify and repair any refrigerant leaks in the system to prevent future issues.
2. Recharge Refrigerant:
If the refrigerant levels are low, the technician will recharge the system with the correct amount of refrigerant to restore optimal performance.
3. System Evaluation:
The technician will assess the overall condition of the AC system, including the compressor, evaporator coil, and fan, to ensure that all components are functioning correctly.
4. Preventive Maintenance:
Regular professional maintenance can help prevent issues related to refrigerant levels and ensure the long-term efficiency of your AC system.
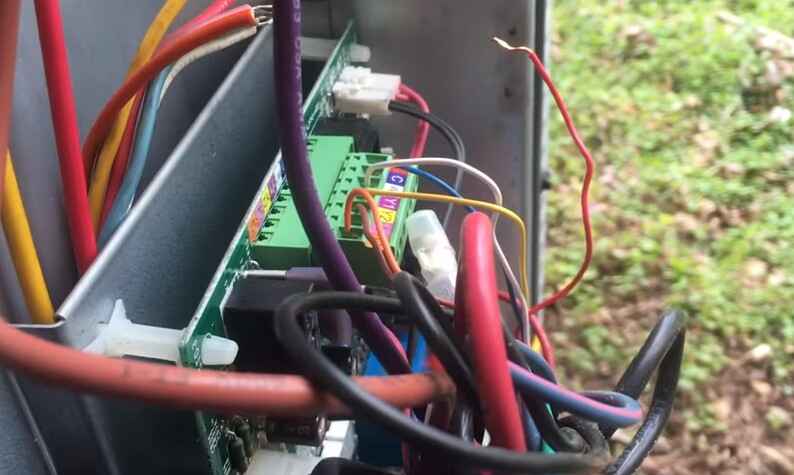
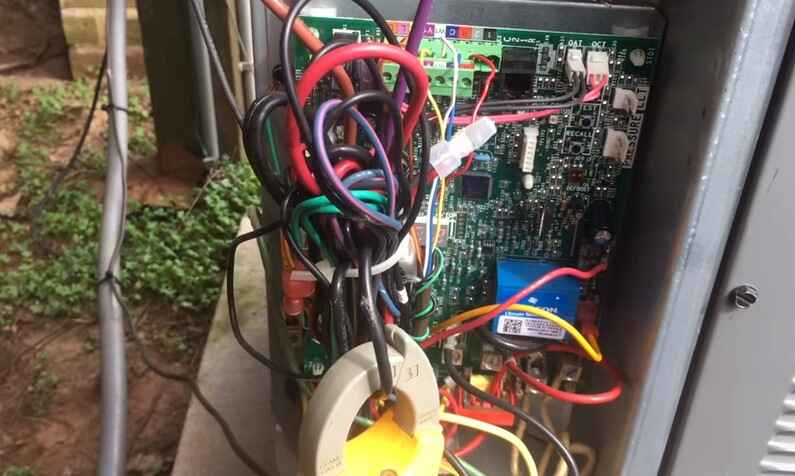
Wiring and Connections
If your Amana AC fan is not working, you can follow these steps to visually inspect the wiring for loose or damaged connections and take corrective measures. However, keep in mind that working with electrical components can be dangerous, and if you are not comfortable or experienced with such tasks, it’s crucial to seek professional help.
A. Visual Inspection of Wiring for Loose or Damaged Connections:
- Turn off the Power: Before inspecting any wiring, make sure to turn off the power to your AC unit. Locate the circuit breaker or disconnect switch and turn it off to ensure your safety.
- Access the AC Unit: Open the access panel to your AC unit. This may involve removing screws or clips, depending on your model.
- Inspect Wiring: Visually examine the wiring inside the unit for any signs of loose or damaged connections. Look for burnt areas, frayed wires, or any visible damage.
- Check for Disconnected Wires: Ensure that all wires are properly connected. Sometimes, vibrations from the unit or other factors can cause wires to become loose.
B. Step-by-Step Guide for Tightening Connections and Repairing Damaged Wires:
- Tighten Loose Connections: Using a screwdriver or the appropriate tool, carefully tighten any loose connections. Make sure not to overtighten, as this can cause damage.
- Repair Damaged Wires: If you find any damaged wires, you may need to cut out the damaged section and splice in a new piece of wire. Use wire nuts or appropriate connectors and ensure a secure connection.
- Insulate Exposed Wires: If you had to cut and splice wires, make sure to insulate the connection using electrical tape or heat shrink tubing. This prevents short circuits and ensures safety.
- Secure Wiring: Check that all wires are properly secured and not in danger of rubbing against any sharp edges or moving parts within the AC unit.
C. Importance of Hiring a Professional for Complex Wiring Issues:
- Safety Concerns: Dealing with electricity can be dangerous, especially if you’re not familiar with the proper safety procedures. Professionals are trained to handle these situations safely.
- Complexity of AC Systems: AC systems can have complex wiring and components. If the issue goes beyond simple loose connections or damaged wires, a professional technician will have the expertise to diagnose and fix the problem.
- Avoiding Further Damage: Incorrectly handling electrical components can lead to more damage. Hiring a professional reduces the risk of causing additional problems.
- Compliance with Local Codes: Professionals are aware of local electrical codes and regulations. Ensuring compliance is essential for both safety and legal reasons.
DIY Solutions and When to Call a Professional
If your Amana AC fan is not working, there are some DIY solutions you can try before calling a professional. However, if you are not comfortable or experienced with handling electrical components, it’s always best to seek professional help to avoid any safety risks. Here are some steps you can take:
A. Troubleshooting Steps Users Can Perform on Their Own:
1. Check the Power Supply:
Ensure that the AC unit is receiving power. Check the circuit breaker and make sure it hasn’t tripped.
Verify that the thermostat is set correctly and the batteries, if applicable, are in good condition.
2. Inspect the Air Filter:
A clogged or dirty air filter can restrict airflow and cause the fan to malfunction. Replace or clean the filter according to the manufacturer’s recommendations.
3. Examine the Fan Blades:
Inspect the fan blades for any visible damage or obstructions. Turn off the power and carefully remove any debris that may be affecting the fan’s movement.
4. Test the Capacitor:
The capacitor is a common component that can fail. If you’re comfortable doing so, you can use a multimeter to check the capacitor for proper functioning. Replace it if necessary.
5. Check the Thermostat:
Ensure that the thermostat is set to a temperature below the current room temperature. If the thermostat is not functioning correctly, the fan may not engage.
6. Inspect the Wiring:
Check for loose or disconnected wires. If you find any issues, turn off the power and reconnect or tighten the wires. Always exercise caution when working with electrical components.
7. Clean the Condenser Unit:
If the condenser unit (located outside) is dirty or covered in debris, it can affect the fan’s performance. Clean the condenser unit, and ensure there’s proper clearance around it.
B. Clear Indications of When to Seek Professional Assistance:
1. Unusual Noises:
Grinding, squealing, or banging noises may indicate mechanical issues that require professional attention.
2. Electrical Problems:
If you suspect electrical issues, such as a faulty capacitor or wiring problems, it’s safer to call a professional technician to handle the repairs.
3. Refrigerant Leaks:
Refrigerant leaks can pose health risks and should be addressed by a qualified technician.
4. Persistent Issues:
If you’ve tried basic troubleshooting steps without success, or if the problem recurs shortly after DIY fixes, it’s time to consult a professional.
5. Complex Repairs:
For complex components like the compressor or motor, it’s advisable to seek professional help due to the technical expertise required.
C. Benefits of Regular Professional Maintenance:
1. Preventive Measures:
Regular maintenance can identify and address potential issues before they escalate, preventing breakdowns.
2. Optimized Performance:
Professional servicing ensures that the AC unit operates at peak efficiency, providing better cooling and energy savings.
3. Extended Lifespan:
Routine maintenance can extend the lifespan of your AC unit, saving you money on premature replacements.
4. Improved Air Quality:
Clean filters and well-maintained components contribute to better indoor air quality.
5. Energy Efficiency:
A well-maintained AC system operates more efficiently, reducing energy consumption and lowering utility bills.
In summary, while some troubleshooting can be done by users, certain issues and maintenance tasks are best handled by trained professionals to ensure safety and optimal system performance. Regular professional maintenance is crucial for preventing future problems and maximizing the lifespan of your Amana AC unit.
Conclusion
In conclusion, troubleshooting and resolving issues with your Amana AC unit fan not working is crucial for maintaining a comfortable indoor environment. From checking the power source to inspecting the capacitor and wiring, addressing these issues promptly ensures efficient cooling and prolongs the lifespan of your unit. Regular maintenance and professional assistance, when needed, are key to keeping your Amana AC system in top condition. By understanding the common causes and following the troubleshooting steps outlined in this post, you can restore your AC unit’s fan functionality and enjoy a cool and refreshing home environment.
2 Comments