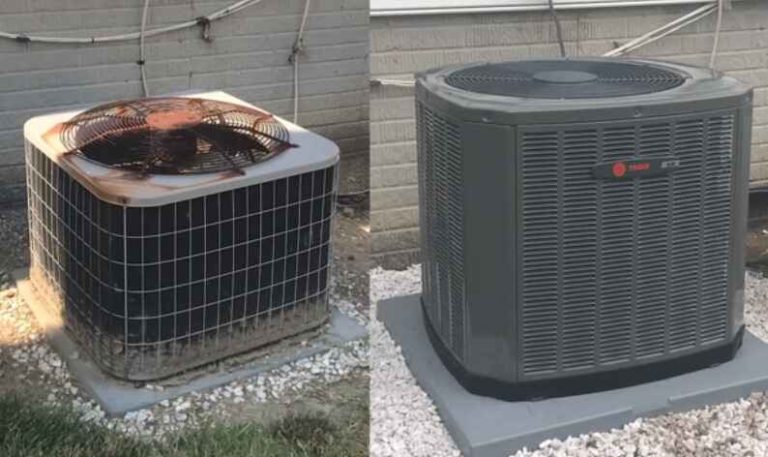
To address Arctic Air Conditioner leaking water, check the drain pan for clogs, ensure proper unit tilt for drainage, and examine the condensate line for blockages. Regular maintenance prevents leaks and keeps the unit functioning efficiently.
If you’ve noticed water leaking from your Arctic Air conditioner, don’t panic. There are several potential reasons for this issue, and in this article, we will help you troubleshoot and fix the problem.
Some common causes of water leakage in Arctic Air conditioners include a broken pump, a blocked condensate drain, incorrect installation, cold outdoor temperatures, or leaky internal seals. By identifying the specific cause, you can take the necessary steps to address and resolve the issue.
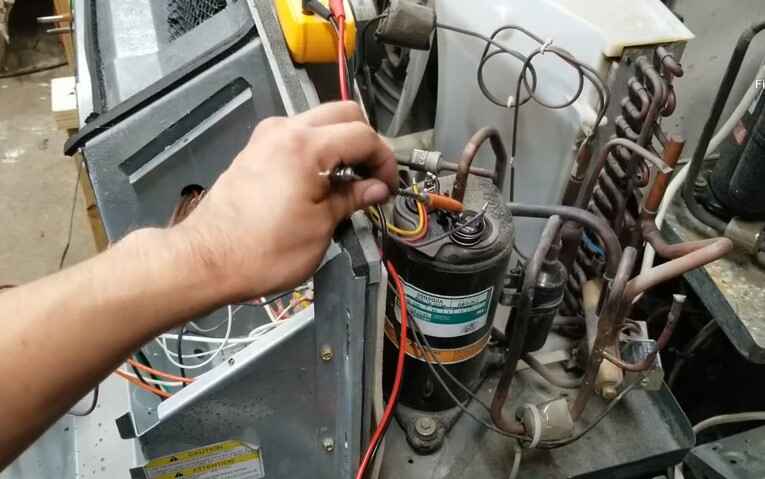
To fix a water leak in your Arctic Air conditioner, start by testing the pump. If it’s not working properly, you may need to replace it. Next, check the condensate drain for any blockages. If you find a clog, it’s best to seek professional help to avoid causing further damage.
Additionally, ensure that your Arctic Air conditioner is installed on a level surface. If it’s tilted, water may accumulate and leak. Opening windows when the outdoor temperature is cool can also help prevent condensation and water buildup.
If you’ve tried these troubleshooting steps and the issue persists, it’s recommended to enlist the expertise of an HVAC contractor. They can inspect your Arctic Air conditioner, reseal any loose internal seals, and ensure optimal performance moving forward.
Remember, regular maintenance is crucial for preventing water leaks in your Arctic Air conditioner. Clean or replace the air filter regularly to ensure proper airflow, check the condensate drain for blockages, and have routine maintenance performed by a professional.
By following these tips and taking proper care of your Arctic Air conditioner, you can enjoy a cool and comfortable environment without any water leak issues.
Key Takeaways:
- Water leakage in Arctic Air conditioners can be caused by various factors such as a broken pump, a blocked condensate drain, incorrect installation, cold outdoor temperatures, or leaky internal seals.
- To fix a water leak, you can test the pump, unclog the drain, level the unit, open windows when it’s cool outside, or seek professional help from an HVAC contractor.
- Regular maintenance, including cleaning or replacing the air filter and inspecting the unit for loose seals, is essential for preventing water leaks in your Arctic Air conditioner.
Reasons for Water Leaking from Arctic Air Conditioner
If you’ve noticed water leakage from your Arctic Air conditioner, it’s essential to understand the potential causes to address the issue effectively. Several factors can contribute to water leaks:
- Broken Pump: A malfunctioning or broken pump can result in water leakage from your Arctic Air conditioner. This issue may require repair or replacement.
- Blocked Condensate Drain: A blocked condensate drain can prevent water from draining properly, leading to leaks. Clearing the blockage is necessary to resolve this problem.
- Incorrect Installation: Improper installation can cause water to accumulate and leak from your Arctic Air conditioner. Checking the installation and making necessary adjustments may be required.
- Cold Outdoor Temperature: Extremely cold outdoor temperatures can cause ice to form on the cooling components of the air conditioner. As the ice melts, it can result in water leakage. Ensuring proper insulation and temperature regulation can prevent this issue.
- Leaky Internal Seals: Leaky internal seals within the Arctic Air conditioner can cause water to escape and lead to leaks. Fixing or replacing the seals may be necessary to resolve this issue.
Identifying the specific cause of the water leak is crucial to implementing the appropriate solution and preventing further leakage.
| Cause | Description |
|---|---|
| Broken Pump | A malfunctioning or broken pump that fails to expel water properly, resulting in leaks. |
| Blocked Condensate Drain | An obstruction in the condensate drain prevents water from draining, leading to leaks. |
| Incorrect Installation | Improper installation can cause improper drainage and lead to water leakage. |
| Cold Outdoor Temperature | Extremely cold temperatures can cause ice buildup, which melts and leads to water leakage. |
| Leaky Internal Seals | Leaking internal seals within the Arctic Air conditioner can result in water leaks. |
By addressing the underlying cause of the water leak, you can effectively resolve the issue and ensure your Arctic Air conditioner operates optimally.
Troubleshooting Arctic Air Conditioner Water Leaks

To troubleshoot water leaks in your arctic air conditioner, we recommend following these simple steps:
- Check the pump: Start by inspecting the pump to ensure it’s working properly. If the pump is faulty, it may not be effectively removing the condensate, leading to water leaks. If you notice any signs of damage or malfunction, it’s best to replace the pump.
- Examine the condensate drain: Next, check the condensate drain for any blockages. A clogged drain can cause water to back up and leak from your arctic air conditioner. If you find any debris or buildup, carefully remove it using a drain brush or call a professional for assistance.
- Ensure proper installation: Make sure your arctic air conditioner is installed on a level surface. An uneven installation can result in water pooling and leaking from the unit. If necessary, use leveling pads or consult an HVAC contractor for professional installation.
- Consider outdoor temperature: If the outdoor temperature is unusually cold, condensation may freeze on the cooling coils and result in water leaks. To prevent this, consider opening windows or adjusting the temperature settings to minimize water accumulation.
If you’ve followed these troubleshooting tips and are still experiencing water leaks, it’s recommended to have an HVAC contractor inspect your arctic air conditioner. They can identify and address any loose internal seals or other issues that may be causing water vapor to condense and pool, leading to leaks.
By taking these proactive steps, you can effectively troubleshoot and resolve water leaks in your arctic air conditioner, ensuring optimal performance and preventing any further damage.
Preventing Water Leakage in Arctic Air Conditioner

To ensure your arctic air conditioner operates smoothly and efficiently, it’s essential to take proactive measures to prevent water leakage. Regular maintenance and inspections play a key role in identifying and addressing any potential issues before they escalate into major problems.
The Importance of Regular Maintenance
Regular maintenance is crucial for preventing water leakage in your arctic air conditioner. By performing routine maintenance tasks, you can ensure proper functioning of the unit and minimize the risk of water leaks.
- Cleaning or replacing the air filter: A clogged or dirty air filter can obstruct airflow, leading to excessive condensation and water leakage. Regularly clean or replace the air filter to maintain optimal airflow and prevent water accumulation.
- Checking the condensate drain: The condensate drain carries condensed water away from the air conditioner. Over time, it can become clogged with dust, debris, or mold, causing water to overflow and leak. Regularly inspect and clean the condensate drain to prevent blockages and water leakage.
- Inspecting for loose seals: Over time, seals in the arctic air conditioner can wear out or become loose, leading to water leakage. Regularly inspect the unit for any signs of loose seals and have them repaired or replaced as necessary.
By incorporating these maintenance tasks into your regular routine, you can significantly reduce the risk of water leakage in your arctic air conditioner.
Professional Inspections and Maintenance
While regular maintenance tasks can go a long way in preventing water leakage, it’s also essential to have a professional inspect and maintain your arctic air conditioner periodically. HVAC technicians have the expertise and knowledge to identify any potential issues that may not be visible to the average homeowner.
During a professional maintenance visit, an HVAC technician will thoroughly inspect and clean your arctic air conditioner, ensuring all components are in proper working order. They can also address any minor issues before they escalate into major problems, saving you time, money, and potentially costly repairs in the future.
By investing in professional maintenance, you can have peace of mind knowing that your arctic air conditioner is in top condition and less likely to experience water leakage issues.
In Summary
Preventing water leakage in your arctic air conditioner requires regular maintenance, including cleaning or replacing the air filter, checking the condensate drain for blockages, and inspecting the unit for loose seals. Additionally, scheduling professional inspections and maintenance visits ensures that any potential issues are identified and addressed promptly.
By following these preventive measures, you can enjoy the benefits of a properly functioning arctic air conditioner without the inconvenience of water leakage.
Cleaning Your Arctic Air Conditioner Cooling Cartridge

To keep your arctic air conditioner in optimal working condition, it’s important to regularly clean the cooling cartridge. A clean cooling cartridge ensures efficient cooling and helps maintain the overall performance of your arctic air conditioner.
To clean the cooling cartridge, follow these simple steps:
- Remove the cooling cartridge tray from your arctic air conditioner.
- Wipe the cooling cartridge with warm, soapy water to remove any dirt or debris.
- Rinse off any residue from the cartridge.
- Let the cooling cartridge air dry completely before reinserting it into the tray.
If the water tank of your arctic air conditioner is dirty, you can use a small brush to clean the inside of the tank. This helps ensure clean and fresh air output from the unit.
It’s also important to replace the cooling cartridge every 3-6 months for optimal performance. Over time, the cooling cartridge may become less effective, and replacing it regularly ensures that your arctic air conditioner continues to cool efficiently.
| Step | Instructions |
|---|---|
| 1 | Remove the cooling cartridge tray from your arctic air conditioner. |
| 2 | Wipe the cooling cartridge with warm, soapy water to remove any dirt or debris. |
| 3 | Rinse off any residue from the cartridge. |
| 4 | Let the cooling cartridge air dry completely before reinserting it into the tray. |
Regular cleaning and maintenance of your arctic air conditioner cooling cartridge not only ensure better cooling performance but also contribute to the longevity of the unit.
Tips for Faster Cooling with Arctic Air Conditioner

If you want to achieve faster cooling with your Arctic Air conditioner, we have some helpful tips for you. By following these suggestions, you can create a cooler environment more quickly and enjoy the refreshing benefits of your Arctic Air unit.
1. Pre-Soak the Cooling Cartridge
One effective method to enhance the cooling power of your Arctic Air conditioner is to pre-soak the cooling cartridge before use. Simply place the cartridge under cold water for a few minutes to allow it to absorb moisture. This pre-soaking process helps to maximize the cartridge’s ability to cool the incoming air, resulting in a more efficient cooling experience.
2. Freeze the Cooling Cartridge
If you’re looking for even more cooling effect, you can try freezing a wet cooling cartridge. After soaking the cartridge, place it in a sealable plastic bag and put it in the freezer. Once frozen, insert the cartridge into your Arctic Air unit. The icy cold cartridge will provide an extra boost of cooling power, helping you achieve a cooler environment faster.
By incorporating these tips into your cooling routine, you can optimize the performance of your Arctic Air conditioner and enjoy a faster cooling experience.
“Pre-soaking the cooling cartridge and freezing it before use are simple yet effective ways to achieve faster cooling with your Arctic Air conditioner.” – Arctic Cooling Experts
| Benefits of Pre-Soaking the Cooling Cartridge | Benefits of Freezing the Cooling Cartridge |
|---|---|
|
|
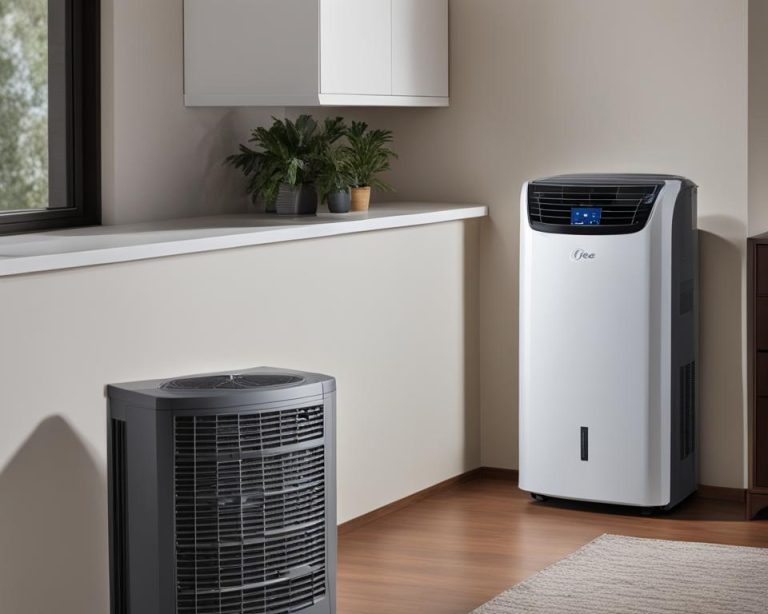
Cleaning and Maintenance Tips for Portable Air Conditioners

Proper cleaning and routine maintenance are crucial to keep your portable air conditioner running smoothly and avoid issues such as water leaks. Here are some tips to help you maintain optimal performance and prevent any potential problems:
Clean the Unit Regularly
Regular cleaning of your portable air conditioner is important to remove dust, dirt, and debris that can accumulate over time. Start by switching off the unit and unplugging it from the power source. Use a soft cloth or vacuum cleaner to clean the exterior surfaces, including the vents and fan blades. Be sure to gently wipe the control panel as well.
Note: For a more thorough cleaning, refer to the manufacturer’s instructions specific to your portable air conditioner model.
Don’t Forget the Air Filter
The air filter plays a vital role in maintaining the efficiency of your portable air conditioner. It helps trap airborne particles and prevents them from entering the unit. Clean or replace the air filter according to the manufacturer’s recommendations, typically every 2-4 weeks or as needed. A clogged or dirty air filter can restrict airflow and cause the unit to work harder, potentially leading to issues like water leaks.
Inspect and Clean the Drain Hose
The drain hose is responsible for removing condensed water from the portable air conditioner. Over time, it can become clogged with dirt or debris, obstructing proper drainage. Inspect the drain hose regularly and clean it if necessary. You can use a small brush or pipe cleaner to remove any blockages. Ensuring a clear drain hose will prevent water from pooling and potentially leaking out of the unit.
Address Issues Promptly
If you notice any unusual sounds, reduced cooling performance, or water leakage from your portable air conditioner, address the issues promptly. Ignoring these signs can lead to further damage and potentially costly repairs. Contact a professional HVAC technician who can diagnose and fix the problem effectively.
“Routine maintenance and prompt action are essential for preventing portable air conditioner issues. A well-maintained unit will provide you with efficient cooling while avoiding common problems like water leaks.”
Comparison of Recommended Maintenance Tips
| Maintenance Tip | Benefits |
|---|---|
| Regular cleaning of the unit | Removes dust and debris for optimal performance |
| Cleaning or replacing the air filter | Improves airflow and prevents clogs |
| Inspecting and cleaning the drain hose | Ensures proper drainage and prevents water leaks |
| Addressing issues promptly | Prevents further damage and costly repairs |
Regular cleaning and maintenance of your portable air conditioner will not only help prevent water leaks but also extend the lifespan of the unit. By following these tips and staying proactive, you can ensure that your portable air conditioner keeps you cool and comfortable for years to come.
Expert Tips for Preventing Portable Air Conditioner Leaks
In order to prevent leaks in your portable air conditioner, it’s important to follow our expert tips and ensure regular cleaning and maintenance of the unit. By taking these preventative measures, you can identify and address potential issues before they escalate, and keep your portable AC operating efficiently.
Clean and Maintain Your Portable Air Conditioner Regularly
Regular cleaning and maintenance is key to preventing leaks in your portable air conditioner. Make sure to clean both the interior and exterior of the unit, paying special attention to the air filters and condensate drain. Remove any dust or debris that may have accumulated, as this can lead to clogs and water leakage.
Here are some steps you can take to clean and maintain your portable AC:
- Turn off and unplug the unit before cleaning.
- Remove and clean the air filters. If the filters are damaged or worn out, replace them with new ones.
- Carefully clean the condensate drain to remove any blockages. Use a blend of warm water and mild detergent to flush out dirt or debris.
- Gently wipe the exterior surfaces of the unit with a damp cloth to remove dust and grime.
Fix Issues Immediately
If you notice any signs of water leakage or damage in your portable air conditioner, it’s important to address the issue right away. Ignoring leaks or malfunctioning components can lead to further damage and costly repairs. Here are a few common issues and their potential solutions:
If the condensate drain is clogged, try using a thin, flexible brush or a pipe cleaner to remove the blockage. If the clog persists, it’s best to consult a professional technician.
If there are issues with the internal seals, have a qualified technician inspect and reseal the unit to prevent water vapor from condensing and causing leaks.
Ensure that all connections and fittings are secure and properly tightened. Loose connections can cause leaks and lead to water damage.
Properly Position and Ventilate Your Portable AC
Proper placement and ventilation of your portable air conditioner can also help prevent leaks. It’s important to follow the manufacturer’s instructions and ensure that the unit is placed on a stable surface.
Here are a few additional tips for proper positioning and ventilation:
- Make sure the unit is on a level surface to prevent water from pooling inside the unit.
- Leave enough space around the unit for proper airflow and ventilation.
- Avoid blocking the intake and exhaust vents to ensure efficient cooling and prevent overheating.
- If possible, position the unit near a window or door for easy access to external ventilation.
In Summary
By following these expert tips for preventing portable air conditioner leaks, you can ensure that your unit operates efficiently and stays in good working condition. Regular cleaning and maintenance, prompt treatment of any issues, and proper positioning and ventilation are key factors in preserving the performance and longevity of your portable AC. By taking these proactive measures, you can enjoy cool and comfortable air without the worry of leaks or water damage.
How Arctic Air® Works and Cleaning Instructions
Arctic Air® is a portable personal evaporative cooling device designed to provide a refreshing and comfortable environment. Our innovative technology cools and humidifies the air, making it ideal for hot summer days or dry climates.
To ensure optimal performance and maintain the cleanliness of your Arctic Air® unit, regular cleaning is essential. Here are the step-by-step instructions on how to clean your Arctic Air® cooling cartridge:
- First, unplug the device and remove the cooling cartridge tray from the unit.
- Wipe the cooling cartridge tray and the grill with a soft cloth or sponge dampened with warm, soapy water. Be sure to clean any accumulated dust or debris.
- Rinse the tray and grill thoroughly with clean water to remove any residue.
- Allow the tray and grill to air dry completely before reassembling them back into the unit.
In addition to cleaning the cooling cartridge tray, it’s also recommended to clean the water tank if it becomes dirty. To clean the water tank:
- Remove the water tank from the unit.
- Wash the water tank with warm, soapy water, ensuring to clean the inside thoroughly.
- Rinse the tank with clean water and allow it to dry completely.
- Once dry, reattach the water tank to the unit.
Regular cleaning of your Arctic Air® cooling cartridge and water tank helps maintain its effectiveness and ensures that you continue to enjoy cool and fresh air. We recommend cleaning the cooling cartridge and water tank every two weeks or as needed, depending on usage and environmental conditions.
Comparison of Arctic Air® Models:
| Arctic Air® Model | Cooling Capacity | Water Tank Capacity | Dimensions |
|---|---|---|---|
| Arctic Air® Ultra | Up to 45 cubic feet per minute | Up to 750 ml | Approx. 6.7 x 5.7 x 5.6 inches |
| Arctic Air® Pro | Up to 70 cubic feet per minute | Up to 1 liter | Approx. 11.4 x 11.4 x 10.2 inches |
| Arctic Air® Tower | Up to 85 cubic feet per minute | Up to 1.2 liters | Approx. 10.46 x 8.4 x 47.24 inches |
We hope these instructions help you keep your Arctic Air® unit clean and operating efficiently. Regular cleaning and maintenance are essential to ensure the longevity of your device and continue enjoying the benefits of Arctic Air®.
Tips for Getting Cooler Air Faster with Arctic Air®
To achieve cooler air faster with your Arctic Air®, we have a couple of tips that can help. By following these techniques, you’ll be able to experience cooler air more quickly and enjoy a comfortable environment.
- Pre-soak the cooling cartridge: Before using your Arctic Air®, try pre-soaking the cooling cartridge under cold water. This simple step enhances the cooling power of the cartridge and helps it deliver cooler air more efficiently.
- Freeze the cooling cartridge: For even more cooling effect, you can freeze a wet cooling cartridge. Place a damp cooling cartridge in the freezer until it’s completely frozen. Once frozen, insert the cartridge into your Arctic Air®. The frozen cartridge will provide an extra boost of coolness in your space.
By implementing these tips, you can maximize the cooling potential of your Arctic Air® and enjoy a refreshing and comfortable atmosphere in no time!
| Tip | Technique |
|---|---|
| 1 | Pre-soak the cooling cartridge |
| 2 | Freeze the cooling cartridge |
FAQs about Arctic Air® and Cooling Devices
As we strive to provide you with all the information you need, we’ve compiled a list of frequently asked questions about Arctic Air® and cooling devices. Whether you’re curious about how Arctic Air® works, how to clean the device and cooling cartridge, or how to replace the cooling cartridge, we’ve got you covered. Additionally, we’ll address common queries regarding the difference between Arctic Air® and other cooling devices, the factors that affect the degree of cooling, and the noise level of Arctic Air®. Read on to find answers to your burning questions!
How does Arctic Air® work?
Arctic Air® is a portable personal evaporative cooling device that cools and humidifies the air around you. It operates by drawing in warm air, passing it through a cooling cartridge, and releasing a stream of cool, moist air to create a more comfortable environment. The cooling cartridge utilizes evaporative cooling technology, providing a refreshing sensation without the need for a traditional air conditioner.
How do I clean my Arctic Air® device and cooling cartridge?
Cleaning your Arctic Air® device and cooling cartridge is simple. Start by wiping the cooling cartridge tray and grill with warm, soapy water. Rinse off any residue and allow them to air dry completely before reassembling. If the water tank is dirty, use a small brush to clean the inside of the tank. Regular cleaning helps maintain the performance and efficiency of your Arctic Air® device.
How do I replace the cooling cartridge?
Replacing the cooling cartridge in your Arctic Air® device is quick and easy. Begin by removing the old cartridge from the cartridge tray. Insert the new cartridge into the tray, ensuring it is properly aligned. Then, securely place the tray back into the device. It is recommended to replace the cooling cartridge every 3-6 months for optimal cooling performance.
What sets Arctic Air® apart from other cooling devices?
Arctic Air® stands out from other cooling devices due to its portability, ease of use, and affordability. Unlike traditional air conditioners, Arctic Air® does not require complicated installation or expensive energy bills. Its compact size makes it perfect for personal use, whether you’re at home, in the office, or on the go. With Arctic Air®, you can enjoy a cool and comfortable space wherever you are.
What factors influence the degree of cooling with Arctic Air®?
Several factors can affect the degree of cooling you experience with Arctic Air®. These include the ambient temperature and humidity, the size of the space you’re using it in, and the distance between you and the device. Additionally, increasing the airflow by adjusting the fan speed or opening windows can enhance the cooling effect. Experimenting with different settings and placements will help you find the optimal cooling experience.
How noisy is Arctic Air®?
One of the advantages of Arctic Air® is its quiet operation. It is designed to provide a peaceful and comfortable environment without generating excessive noise. While there may be a gentle hum from the fan, it is generally not disruptive or bothersome.
If you have any further questions about Arctic Air® or cooling devices, feel free to reach out to us. We’re here to assist you in creating a cool and soothing environment.
| Frequently Asked Questions |
|---|
| How does Arctic Air® work? |
| How do I clean my Arctic Air® device and cooling cartridge? |
| How do I replace the cooling cartridge? |
| What sets Arctic Air® apart from other cooling devices? |
| What factors influence the degree of cooling with Arctic Air®? |
| How noisy is Arctic Air®? |
Conclusion
Fixing a water leak in your Arctic Air conditioner is crucial to maintain its optimal performance and prevent further damage. By addressing common issues such as a broken pump or a blocked drain, you can easily troubleshoot the problem and ensure a water-tight unit. Regular cleaning and maintenance are essential in preventing water leakage. Cleaning or replacing the air filter, checking the condensate drain, and inspecting the unit for loose seals should be part of your routine Arctic Air conditioner maintenance.
Remember to test the pump, unclog the drain, level the unit, and open windows when the outdoor temperature is cool. It’s also advisable to seek professional assistance in resealing any loose internal seals. By following these maintenance tips and taking proper care of your Arctic Air conditioner, you can enjoy a cool and comfortable environment without any water leak issues.
Preventing water leakage in your Arctic Air conditioner is not only important for its longevity but also for your overall comfort. By adopting a proactive approach to maintenance, you can ensure that your unit operates efficiently and effectively. Regularly cleaning and inspecting the various components, checking for blockages, and addressing any issues promptly can help you prevent water leaks and avoid costly repairs in the future. Invest time in understanding and implementing the recommended maintenance practices to maximize the performance and lifespan of your Arctic Air conditioner.
One Comment