To inspect the AC unit, begin by checking the air filters for dirt and replacing if needed. Examine the thermostat settings and ensure proper calibration. Inspect the condenser coils and clean any debris around the outdoor unit.
Curious about ensuring your AC unit’s optimal performance? Navigating the ins and outs of inspecting your air conditioning system might seem daunting, especially for beginners. Fear not! In this guide, we’ll demystify the process, providing a step-by-step walkthrough on how to inspect AC unit. From checking filters to assessing coolant levels, we’ve got you covered. Get ready to boost your cooling system IQ and keep your space comfortably chilled. Let’s dive into the world of AC inspections together.
Importance of regular inspection for AC units
Regular inspection of air conditioning (AC) units is crucial for several reasons. Proper maintenance helps ensure the efficient and effective operation of the AC system, extends its lifespan, and contributes to indoor comfort and air quality. Here are some key reasons highlighting the importance of regular inspection for AC units:
1. Efficient Operation:
Regular inspections help identify and address issues like refrigerant leaks, clogged filters, or faulty components. Addressing these problems promptly ensures that the AC unit operates at its optimum efficiency.
A well-maintained system requires less energy to cool the space, leading to lower energy consumption and reduced utility bills.
2. Prevention of Breakdowns:
Routine inspections allow for the early detection of potential problems before they escalate into major issues. This helps prevent unexpected breakdowns, reducing the likelihood of emergency repairs and associated costs.
3. Extended Lifespan:
Regular maintenance and inspections contribute to the longevity of the AC unit. By addressing wear and tear, lubricating moving parts, and replacing worn-out components, the system is more likely to function well for a longer period.
4. Improved Air Quality:
AC units play a crucial role in maintaining indoor air quality. Regular inspections include cleaning or replacing air filters, removing dirt and debris from coils, and checking for mold or other contaminants. This helps ensure that the air circulated within the space is clean and healthy.
5. Energy Efficiency:
Dirty or clogged components, such as filters and coils, can force the AC unit to work harder to achieve the desired temperature. Regular inspections and cleaning help maintain optimal airflow, reducing the workload on the system and improving overall energy efficiency.
6. Cost Savings:
Investing in regular inspections and maintenance may incur some upfront costs, but it can save money in the long run. A well-maintained system is less likely to require expensive repairs or replacements, and it operates more efficiently, leading to lower energy bills.
7. Compliance and Warranty Requirements:
Some manufacturers require regular maintenance to keep warranties valid. Regular inspections and maintenance help ensure compliance with these requirements, protecting your investment and potential warranty claims.
8. Environmental Impact:
Properly functioning AC units use less energy, contributing to lower carbon emissions. This is beneficial for the environment and aligns with sustainability goals.
In summary, regular inspection and maintenance of AC units are essential for optimal performance, energy efficiency, cost savings, and the overall well-being of the indoor environment. It is recommended to follow the manufacturer’s guidelines and consult with HVAC professionals to establish a regular maintenance schedule for your specific AC system.
Pre-Inspection Preparation
Before conducting an air conditioner inspection, it’s crucial to prepare adequately to ensure a thorough and efficient assessment. Use the following Air conditioner inspection checklist as a guide for pre-inspection preparation:
A. Turn off the Power:
1. Identify the main power source: Locate the circuit breaker or disconnect switch for the AC unit.
2. Turn off the power: Switch off the AC unit’s power to eliminate the risk of electrical shocks during the inspection.
3. Tag or lock-out: If possible, tag or lock-out the circuit breaker to prevent accidental power restoration.
B. Gather Necessary Tools and Equipment:
1. Inspection checklist: Have a checklist of items to inspect, ensuring a systematic examination.
2. Testing equipment:
Multimeter: for checking electrical components.
Thermometer: for assessing temperature differentials.
Pressure gauges: for measuring refrigerant levels.
Leak detector: to identify refrigerant leaks.
3. Basic tools:
Screwdrivers, pliers, and wrenches for accessing and tightening components.
Tape measure for checking clearances and dimensions.
4. Protective gear:
Safety glasses to protect your eyes.
Work gloves for handling components.
5. Documentation:
Equipment manuals and documentation for reference.
Logbook for recording observations and inspection results.
C. Safety Precautions:
1. Personal protective equipment (PPE):
Wear appropriate PPE, including safety glasses and gloves, to protect against potential hazards.
If working with refrigerants, use a face mask and ensure good ventilation.
2. Secure the work area:
Clear the area around the AC unit to allow easy access and prevent tripping hazards.
If working at heights, use proper fall protection equipment.
3. Verify system pressure:
Ensure that the pressure within the AC unit is at a safe level before starting the inspection.
4. Check for hazardous materials:
Identify and handle any hazardous materials, such as asbestos insulation or refrigerants, following proper protocols.
5. Emergency plan:
Have an emergency plan in place, including the location of emergency exits and first aid kits.
Ensure that communication devices, such as a phone or radio, are accessible.
By following this comprehensive pre-inspection preparation checklist, you can enhance the efficiency and safety of the inspection process for AC units.
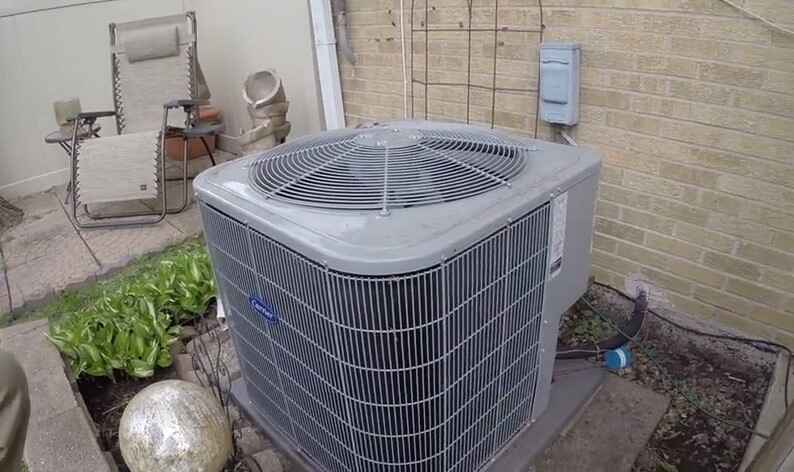
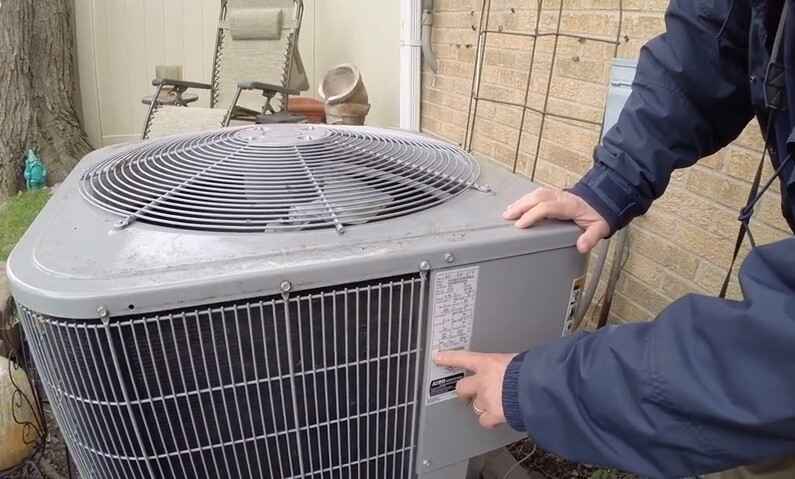
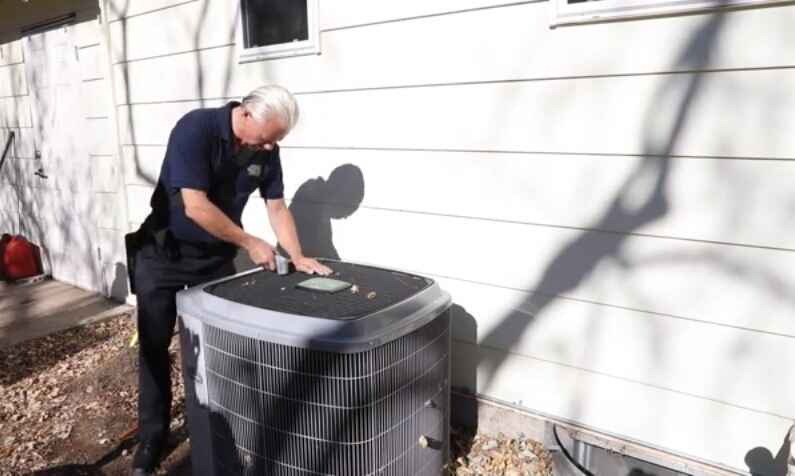
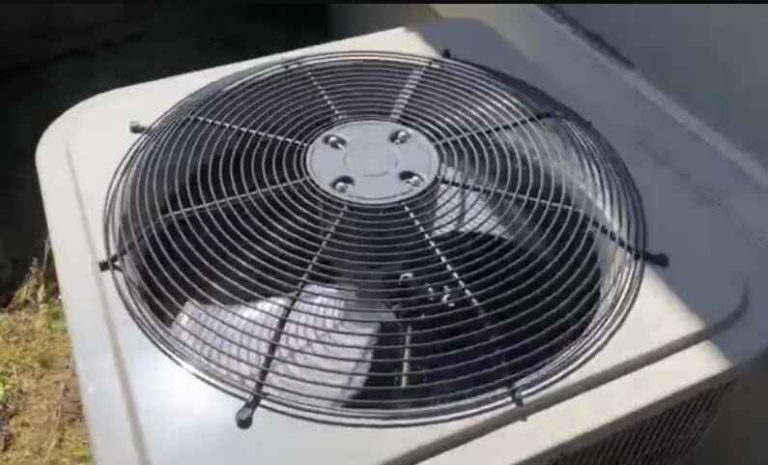
Exterior Inspection
Inspecting the exterior of your air conditioning (AC) unit regularly is crucial to ensure its proper functioning and longevity. Here’s a checklist for an exterior inspection of your AC unit:
1. Clearance around the unit:
Ensure there is at least 2 feet of clear space around the entire unit to allow for proper airflow.
2. Debris removal:
Clear any leaves, twigs, grass, or other debris from the unit and its surrounding area. Debris can obstruct airflow and reduce the efficiency of the unit.
3. Level positioning:
Check if the AC unit is level. An unlevel unit may cause strain on the compressor and affect its efficiency.
4. Secure electrical connections:
Inspect the electrical connections for any signs of wear or damage. Ensure that all connections are tight and secure.
5. Condenser coils:
Inspect the condenser coils for dirt or dust buildup. Dirty coils reduce the unit’s efficiency. Clean the coils using a soft brush or compressed air, being careful not to damage the fins.
6. Fan blades:
Check the fan blades for any damage or deformation. Make sure they are clean and free from obstructions.
7. Fins:
Inspect the fins on the condenser for any bending or damage. Straighten bent fins using a fin comb to maintain proper airflow.
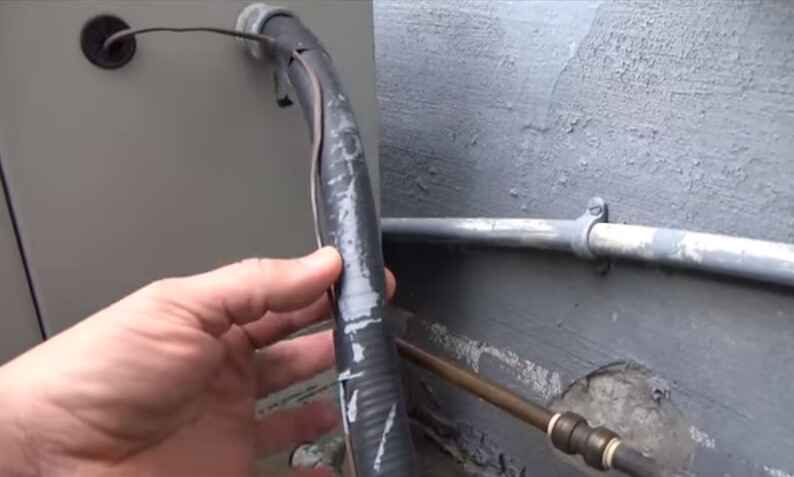
8. Refrigerant lines:
Examine the refrigerant lines for any signs of leaks, wear, or damage. If you notice any issues, contact a professional HVAC technician for repairs.
9. Insulation:
Check the insulation on the refrigerant lines. If it’s damaged, replace it to prevent energy loss and ensure proper cooling efficiency.
10. Drainage:
Ensure that the condensate drainage system is clear of obstructions. A clogged drain can lead to water damage and affect the unit’s performance.
11. Examine the cabinet:
Inspect the unit’s cabinet for any rust, corrosion, or physical damage. Repair or replace any damaged components.
12. Secure panels:
Ensure all panels and covers are securely in place. Tighten any loose screws or bolts.
13. Check for unusual noises:
Power on the AC unit and listen for any unusual noises, such as grinding, squealing, or banging. Unusual sounds may indicate a problem that needs attention.
Performing these routine inspections can help you identify and address potential issues before they escalate, ensuring your AC unit operates efficiently and has a longer lifespan. If you’re unsure about any aspect of the inspection or if you encounter problems, it’s advisable to consult with a qualified HVAC professional for further assistance.
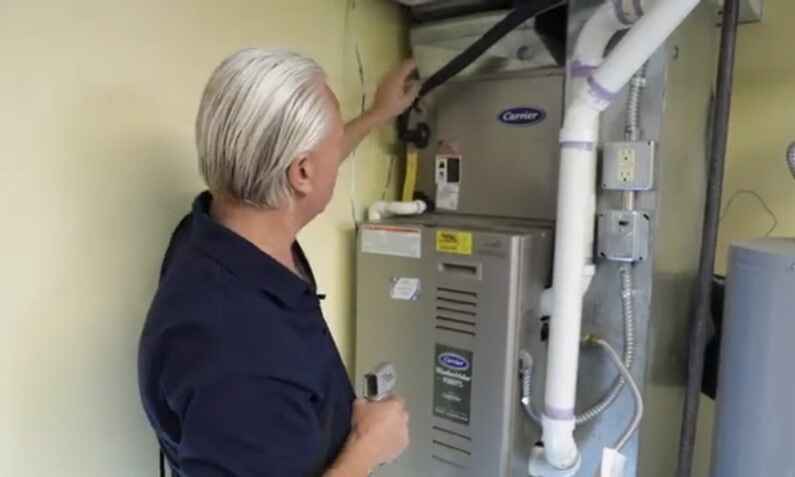
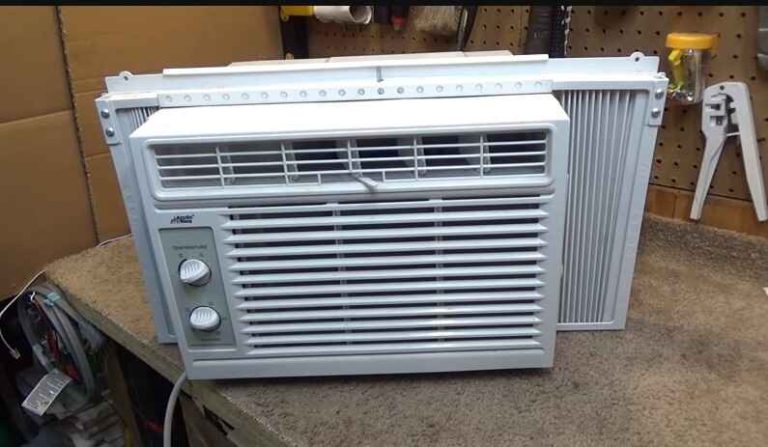
Interior Inspection
Inspecting the interior components of an air conditioning (AC) unit is crucial for ensuring its proper functioning and identifying potential issues. Here’s a general guide for conducting an interior inspection of AC units:
1. Power Off:
Before starting any inspection, ensure that the power to the AC unit is turned off. This can be done by disconnecting it from the electrical supply or turning off the circuit breaker.
2. Safety Gear:
Use appropriate safety gear, such as gloves and safety glasses, to protect yourself from any sharp edges or debris.
3. Access Panels:
Remove the access panels to gain access to the interior components. These panels are usually located on the exterior of the AC unit.
4. Inspect the Evaporator Coil:
Check the condition of the evaporator coil. Look for signs of dirt, dust, or debris accumulation. If there is significant buildup, it can affect the efficiency of the cooling process. Clean the coil if necessary.
5. Check the Condenser Coil:
Inspect the condenser coil, which is located in the outdoor unit. Similar to the evaporator coil, ensure that it is clean and free of debris. Clean it if needed.
6. Inspect the Refrigerant Lines:
Examine the refrigerant lines for any signs of leaks. Leaking refrigerant can lead to inefficient cooling and should be addressed promptly.
7. Examine the Ductwork:
Check the ductwork for any signs of damage, such as leaks or disconnected sections. Properly sealed and insulated ducts are essential for efficient cooling.
8. Inspect the Blower Motor and Fan:
Ensure that the blower motor and fan are in good condition. Lubricate the motor if necessary and check the fan blades for any damage.
9. Check the Air Filters:
Inspect and replace air filters if they are dirty or clogged. Dirty filters can restrict airflow and reduce the overall efficiency of the AC unit.
10. Inspect Electrical Components:
Carefully inspect all electrical components, including wiring, contacts, and capacitors. Look for signs of wear, damage, or overheating. Replace any faulty components.
11. Check Thermostat Settings:
Verify that the thermostat is functioning correctly and set to the desired temperature. Replace the thermostat batteries if applicable.
12. Inspect the Drain Pan and Drain Lines:
Ensure that the drain pan is clean and free of standing water. Check the drain lines for any clogs or blockages, as these can lead to water damage.
13. Tighten Loose Components:
Check for any loose bolts, nuts, or screws and tighten them as needed. Vibrations during operation can sometimes cause components to become loose.
14. Run a Test Cycle:
After completing the inspection and necessary maintenance, turn on the AC unit and run a test cycle to ensure that it operates smoothly.
If you are not comfortable or experienced with AC unit inspections, it’s advisable to seek professional help from a licensed HVAC technician. Regular maintenance and inspections can help extend the life of your AC unit and ensure optimal performance.
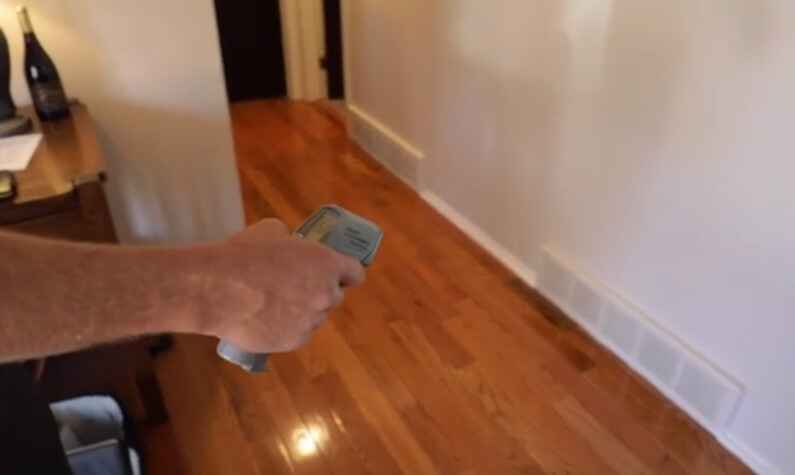
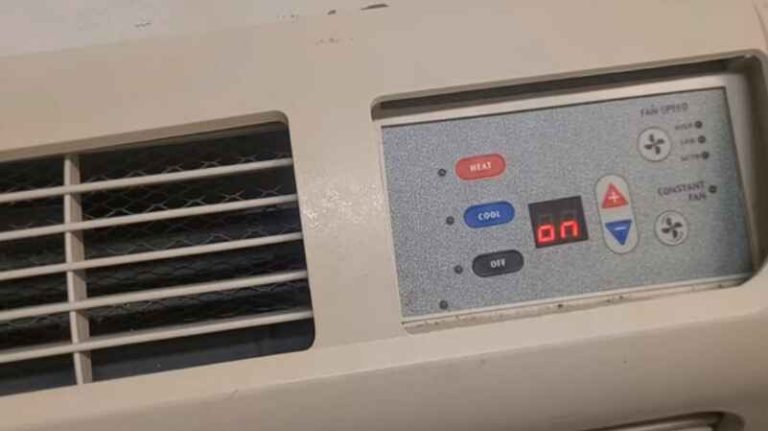
Thermostat Examination
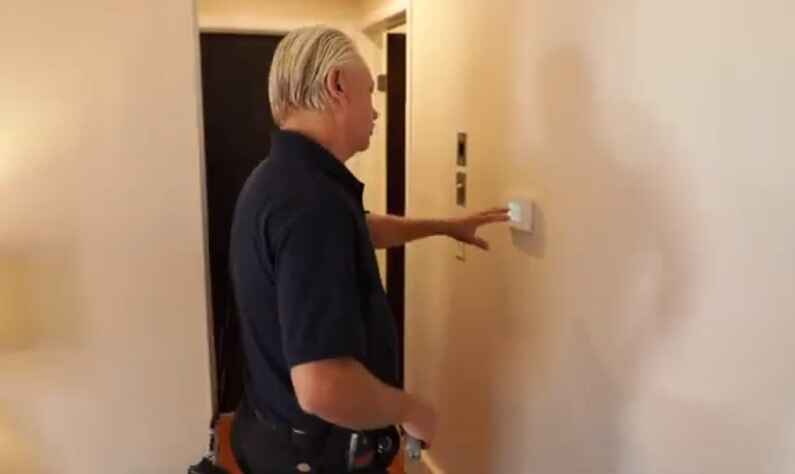
Examining a thermostat is a crucial part of inspecting an air conditioning (AC) unit. The thermostat plays a key role in controlling the temperature and operation of the AC system. Here’s a step-by-step guide for conducting a thermostat examination:
1. Power Off:
Before starting any inspection, turn off the power to the AC unit. This can typically be done by switching off the circuit breaker or disconnecting power at the main electrical panel.
2. Visual Inspection:
Inspect the thermostat for physical damage or signs of wear. Look for cracks, loose wires, or any unusual marks.
3. Temperature Settings:
Check the temperature settings on the thermostat. Ensure that the desired temperature is set correctly. If the thermostat has a programmable feature, review the programmed schedule.
4. Battery Check:
If your thermostat uses batteries, check and replace them if necessary. Some thermostats may have a low battery indicator.
5. Mode Selection:
Test different modes, such as heating, cooling, and fan-only modes. Make sure the thermostat switches between modes smoothly.
6. Fan Operation:
Test the fan operation by turning it on and off. Ensure that the fan responds promptly and runs smoothly.
7. Wiring Inspection:
Carefully inspect the wiring connected to the thermostat. Look for loose or disconnected wires. Ensure that the wires are securely connected to their respective terminals.
8. Thermostat Location:
Check the thermostat’s location. It should be installed away from heat sources, direct sunlight, and drafts. If it’s exposed to extreme conditions, it may affect its accuracy.
9. Level Check:
Ensure that the thermostat is level on the wall. A tilted thermostat can affect its temperature readings.
10. Calibration Check:
If possible, check the thermostat’s calibration. You may need a separate thermometer to compare the thermostat’s reading with an accurate temperature measurement.
11. Sensor Inspection:
Some thermostats have internal temperature sensors. Ensure that these sensors are clean and free from any obstructions.
12. Compatibility Check:
Verify that the thermostat is compatible with your AC unit. Check the manufacturer’s specifications and guidelines.
13. Testing:
Turn the power back on and test the entire system. Observe if the AC unit starts and stops as expected based on the thermostat settings.
14. Software/Firmware Updates:
If your thermostat is programmable or smart, check if there are any available updates for the software or firmware. Updating can resolve bugs and improve performance.
If you encounter any issues during the examination that you cannot resolve, it’s advisable to consult a professional HVAC technician for further inspection and repairs.
Checking Refrigerant Levels
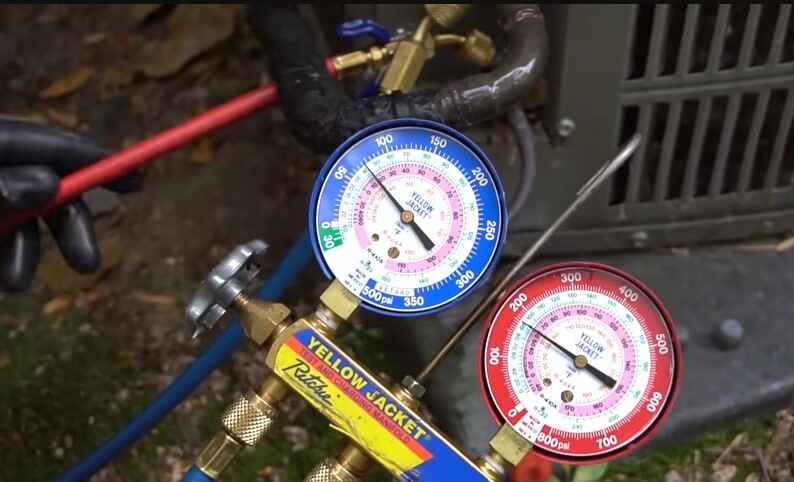
Checking refrigerant levels is a crucial part of inspecting an air conditioning (AC) unit. Proper refrigerant levels are essential for the efficient and effective operation of the system. Here’s a guide on how to check refrigerant levels as part of an AC unit inspection:
1. Safety First:
Before you begin any inspection or maintenance, ensure that the power to the AC unit is turned off. This is important for your safety.
2. Gather Necessary Tools:
You’ll need specific tools to check refrigerant levels, including a refrigerant manifold gauge set and a thermometer.
3. Locate the Refrigerant Lines:
Identify the refrigerant lines. There are two main lines – the larger line is the suction line (low-pressure side), and the smaller line is the liquid line (high-pressure side).
4. Attach Gauges:
Connect the manifold gauge set to the service ports on the suction and liquid lines. The low-pressure gauge (blue) connects to the suction line, and the high-pressure gauge (red) connects to the liquid line.
5. Turn on the AC Unit:
Turn on the AC unit and let it run for a few minutes to stabilize the system.
6. Read Gauges:
Check the pressure readings on the low and high-pressure gauges. These readings will give you an indication of the system’s refrigerant levels.
Compare the readings to the manufacturer’s specifications. These specifications can usually be found in the unit’s technical documentation or on a label on the unit itself.
7. Temperature Check:
Use a thermometer to measure the temperature of the air entering the evaporator coil (return air) and the air leaving the condenser coil (supply air).
Compare these temperatures to the recommended temperature difference provided by the manufacturer.
8. Interpret Results:
If the pressure readings are outside the recommended range or if the temperature difference is not within the specified range, it may indicate a refrigerant issue.
Low refrigerant levels could be a sign of a leak in the system, and high levels might indicate overcharging.
9. Inspect for Leaks:
If you suspect a refrigerant leak, inspect the refrigerant lines, coils, and connections for any signs of oil or refrigerant stains.
10. Consult a Professional:
If you’re not familiar with HVAC systems or if you identify any issues during the inspection, it’s recommended to consult a professional HVAC technician for further diagnosis and repairs.
Regular maintenance and periodic professional inspections are crucial to ensuring the optimal performance and longevity of your AC unit.
Inspecting Ductwork
Inspecting ductwork is an important aspect of the overall inspection of an air conditioning (AC) unit. Properly functioning ductwork is crucial for the efficient and effective distribution of conditioned air throughout a building. Here are some key points to consider when inspecting ductwork as part of an AC unit inspection:
1. Visual Inspection:
Leaks and Gaps: Look for any visible signs of leaks, gaps, or disconnected sections in the ductwork. These can lead to energy losses and decreased system efficiency.
Insulation: Check the insulation on the ducts. Insulation helps prevent energy loss and maintains the desired temperature of the conditioned air.
2. Seals and Joints:
Inspect Seals and Joints: Ensure that all seals and joints are properly sealed. Leaky joints can result in air loss, reducing the system’s efficiency and increasing energy costs.
Use Smoke or Fog Test: In some cases, professionals may use smoke or fog tests to identify leaks in the ductwork.
3. Duct Material:
Evaluate Duct Material: Check the material of the ducts. Ductwork can be made of various materials, including metal, fiberglass, or flexible materials. Ensure that the material is suitable for the intended application and is in good condition.
4. Duct Sizing:
Check Sizing: Ensure that the ducts are appropriately sized for the air distribution needs of the space. Improperly sized ducts can lead to uneven heating or cooling and reduced system performance.
5. Dampers and Airflow:
Inspect Dampers: Check dampers for proper operation. Dampers control the flow of air within the ductwork and should be adjusted as needed.
Check Airflow: Assess the overall airflow within the ducts. Obstructions or blockages can impede the flow of air and affect the performance of the AC system.
6. Registers and Grilles:
Inspect Registers and Grilles: Ensure that registers and grilles are clean and unobstructed. Dirty or blocked registers can limit the airflow and reduce system efficiency.
7. Condensation:
Check for Condensation: Inspect the ducts for any signs of condensation. Excessive condensation can lead to mold growth and affect indoor air quality.
8. Accessibility:
Ensure Accessibility: Verify that the ductwork is accessible for inspection and maintenance. Inaccessible ducts can make it challenging to address issues or perform necessary repairs.
9. Professional Inspection:
Consider Professional Inspection: For a thorough examination, consider hiring a professional HVAC technician to inspect the ductwork. They may use specialized tools and equipment to identify issues that may not be apparent during a visual inspection.
Regular inspection and maintenance of the ductwork are essential for maintaining a well-functioning AC system, ensuring energy efficiency, and promoting indoor air quality.
Checking Electrical Components
When inspecting an AC unit, checking electrical components is crucial for ensuring safe and efficient operation. Here’s a breakdown of the tasks mentioned:
A. Inspecting wiring for damage or wear:
Check for any exposed or damaged wires.
Look for signs of wear, such as fraying or insulation damage.
Ensure that the wiring is properly secured and not posing any safety risks.
B. Tightening electrical connections:
Ensure all electrical connections are secure.
Tighten any loose connections, including those in the control panel, thermostat, and other electrical components.
Loose connections can lead to overheating and system inefficiencies.
C. Checking the capacitor for signs of failure:
Inspect the capacitor for bulging, leaking, or other visible signs of damage.
Check for any burnt or melted components on the capacitor.
A failed capacitor can lead to motor issues and reduced overall system performance.
D. Verifying proper voltage and current levels:
Measure and verify that the voltage supplied to the AC unit is within the specified range.
Check the current levels to ensure they are consistent with the manufacturer’s recommendations.
Incorrect voltage or current levels can lead to various problems, including motor failure and decreased efficiency.
Regular inspection and maintenance of these electrical components can help prevent potential issues, improve energy efficiency, and extend the lifespan of the AC unit. It’s important to note that electrical work should be performed by qualified technicians to ensure safety and compliance with local regulations. If you’re not experienced with electrical systems, it’s recommended to hire a professional for such inspections and repairs.
Testing the AC Unit
When testing the AC unit after inspection, you should follow a systematic approach to ensure proper functionality and identify any potential issues. Here’s a step-by-step guide:
A. Turning the AC unit back on:
1. Set the thermostat to a comfortable temperature.
2. Turn on the AC unit and ensure that it starts up without any unusual sounds or delays.
3. Observe the initial startup sequence to ensure all components are functioning correctly.
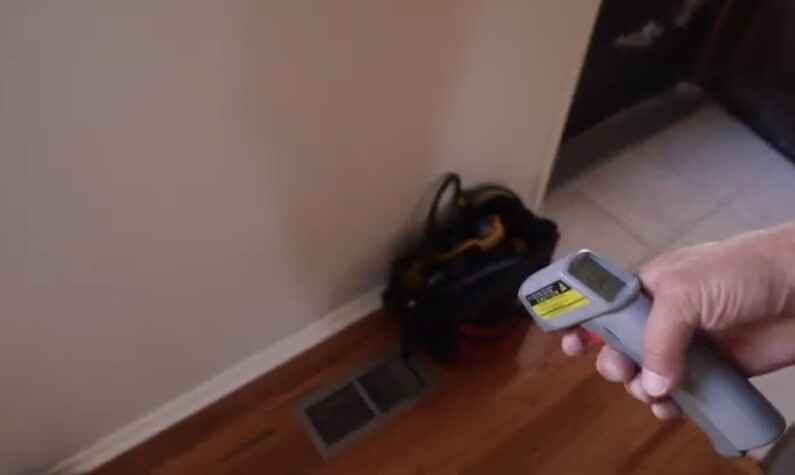
B. Monitoring performance and airflow:
1. Check the airflow: Place your hand in front of the vents to feel the airflow. It should be consistent and strong.
2. Monitor temperature: Verify that the air coming out of the vents is at the desired temperature as set on the thermostat.
3. Inspect the condenser unit: Ensure that the outdoor condenser unit is expelling warm air and that the fan is operating smoothly.
4. Check for any unusual odors: A burning or musty smell could indicate a problem with the system.
C. Listening for unusual sounds:
1. Pay attention to the sound of the compressor: A humming sound is normal, but any loud or unusual noises could indicate issues.
2. Listen for rattling or banging sounds: These may suggest loose components or debris in the system.
3. Check for squealing noises: This could indicate a problem with the fan motor or belt.
If you notice any abnormalities during these steps, it’s essential to address them promptly to prevent further damage or inefficiency. If you’re unsure about the results of the inspection or encounter any issues, it’s recommended to consult with a professional HVAC technician for a more thorough assessment and necessary repairs. Regular maintenance and timely addressing of any problems can help ensure the optimal performance and longevity of your AC unit.
Post-Inspection Maintenance
Post-inspection maintenance for an AC unit is crucial to ensure optimal performance and longevity. Here are the key steps you should consider:
A. Cleaning and Reassembling Components:
1. Filters: Clean or replace air filters regularly, as dirty filters can reduce efficiency and indoor air quality.
2. Coils: Inspect and clean the evaporator and condenser coils to maintain proper heat exchange.
3. Condensate Drain: Ensure the condensate drain is clear of obstructions to prevent water damage and maintain proper humidity levels.
4. Fan Blades: Clean and check the fan blades for any damage or debris that could affect airflow.
5. Ductwork: Inspect and clean the ductwork to remove dust, mold, and other contaminants.
B. Documenting any Issues or Recommendations:
1. Note Any Wear and Tear: Document any visible wear and tear on components like belts, bearings, and electrical connections.
2. Refrigerant Levels: Check and document refrigerant levels. Low levels may indicate a leak that needs to be addressed.
3. Electrical Components: Inspect electrical components for signs of damage or overheating and document any issues.
4. Thermostat Calibration: Verify and document the accuracy of the thermostat settings.
C. Scheduling Professional Maintenance if Necessary:
1. Annual Professional Inspection: Even if you conduct regular DIY maintenance, schedule an annual professional inspection. HVAC technicians can identify and address issues that may not be apparent to the untrained eye.
2. Tightening Connections: Have a professional tighten electrical connections and check for any potential safety hazards.
3. Lubrication: If applicable, ensure that motors and other moving parts are properly lubricated.
Remember, safety is paramount. If you’re not comfortable performing certain tasks or if you encounter complex issues during your inspection, it’s best to hire a qualified HVAC professional to handle the maintenance and repairs. Regular maintenance can significantly extend the life of your AC unit and improve its efficiency, saving you money on energy costs in the long run.
Conclusion
In conclusion, conducting regular inspections of your AC unit is essential for ensuring optimal performance and longevity. By following the step-by-step guide outlined in this blog post, you empower yourself to identify potential issues early on, preventing costly repairs and ensuring your unit operates efficiently. Remember, a well-maintained AC unit not only enhances indoor comfort but also contributes to energy savings. Stay proactive in your approach to AC maintenance, and you’ll enjoy cool, reliable air all year round. Happy inspecting!
25 Comments