To clean debris from the AC unit, turn off power, remove the outer cover, and gently vacuum or brush away dirt and leaves. Clean or replace the filter, straighten bent fins, and ensure the area around the unit is clear.
Clearing debris from your AC unit is a crucial yet often overlooked task for ensuring optimal performance. As a novice, understanding the basics of this maintenance routine is vital. In this guide, we’ll demystify the process, offering step-by-step instructions on how to remove debris from AC unit. From leaves to dirt, we’ve got you covered, so you can keep your cooling system running smoothly and extend its lifespan. Let’s dive into the essentials of AC unit debris cleanup for a cooler, more efficient home.
Importance of maintaining a clean AC unit

Maintaining a clean air conditioning (AC) unit is crucial for several reasons, as it directly impacts both the performance of the system and the quality of indoor air. Here are some key reasons why keeping your AC unit clean is important:
1. Energy Efficiency:
A clean AC unit operates more efficiently. When the evaporator and condenser coils are covered with dirt and debris, they cannot transfer heat as effectively. This results in the system having to work harder and longer to cool your space, leading to increased energy consumption and higher utility bills.
2. Extended Lifespan:
Regular maintenance, including cleaning, can help extend the lifespan of your AC unit. Accumulated dirt and debris can cause components to wear out faster, leading to more frequent breakdowns and the need for premature replacements.
3. Improved Air Quality:
A dirty AC unit can contribute to poor indoor air quality. Dust, mold, and other contaminants can accumulate in the system and then be circulated throughout your home or office. This can exacerbate respiratory issues and allergies and create an uncomfortable living or working environment.
4. Prevention of Mold Growth:
Moisture and dirt in the AC system provide an ideal environment for mold and mildew to grow. Mold spores can be circulated through the air ducts and into the living spaces, posing health risks. Regular cleaning helps prevent mold growth and ensures a healthier indoor environment.
5. Reduced Repair Costs:
Regular maintenance, including cleaning, can help identify and address potential issues before they become major problems. This proactive approach can save you money on costly repairs by addressing minor issues early on.
6. Optimal Cooling Performance:
A clean AC unit can cool your space more effectively. When the evaporator and condenser coils are free from dirt, the system can transfer heat efficiently, ensuring that your space reaches the desired temperature without overworking the unit.
7. Environmental Impact:
An inefficient AC system consumes more energy, contributing to higher carbon emissions. By maintaining a clean and efficient unit, you reduce your carbon footprint and contribute to environmental sustainability.
In summary, regular cleaning and maintenance of your AC unit are essential for optimal performance, energy efficiency, and indoor air quality. It not only saves you money in the long run but also ensures a comfortable and healthy living or working environment.
Signs of Debris Buildup

Debris buildup in an air conditioning (AC) unit can lead to reduced efficiency and potentially cause damage to the system. Here are signs that may indicate debris buildup:
1. Reduced Airflow:
If you notice a decrease in the airflow from the vents, it could be a sign that debris is blocking the air passages in the AC unit. This can hinder the system’s ability to cool effectively.
2. Increased Energy Bills:
A buildup of debris can force the AC unit to work harder to maintain the desired temperature, leading to increased energy consumption. If you see a sudden spike in your energy bills without an apparent reason, it might be worth checking for debris.
3. Uneven Cooling:
Debris accumulation can disrupt the distribution of cooled air throughout your home or building. Rooms may feel unevenly cooled, with some areas being colder or warmer than others.
4. Strange Noises:
Unusual sounds such as rattling, banging, or clicking could indicate that debris has entered the AC unit and is interfering with its components. These noises may be a sign that parts are not functioning correctly.
5. Foul Odors:
Mold, mildew, or other organic matter can accumulate in the AC unit if there is debris buildup. This can result in unpleasant odors emanating from the vents when the system is running.
6. Visible Debris around Vents or Registers:
Check the vents and registers for any visible signs of debris, dust, or dirt. If you see particles around these areas, it’s likely that there is debris inside the system as well.
7. Reduced Cooling Efficiency:
If your AC unit is struggling to cool your space even when set to a lower temperature, it could be a sign of reduced efficiency due to debris blocking the coils or other components.
8. Frequent System Cycling:
A buildup of debris can cause the AC unit to cycle on and off more frequently as it struggles to maintain the desired temperature. Frequent cycling can lead to increased wear and tear on the system.
9. Ice Formation on Coils:
Debris accumulation can restrict the airflow over the evaporator coils, leading to the formation of ice. If you notice ice on the coils, it’s a clear sign that there may be a problem with debris buildup.
If you observe any of these signs, it’s advisable to have a professional HVAC technician inspect and clean your AC unit. Regular maintenance, including cleaning or replacing filters and clearing debris, can help ensure the optimal performance and longevity of your air conditioning system.
Safety Precautions
Cleaning debris from an AC unit is essential for its proper functioning, energy efficiency, and longevity. However, it’s crucial to follow safety precautions to avoid accidents and injuries. Here are some safety measures to consider:
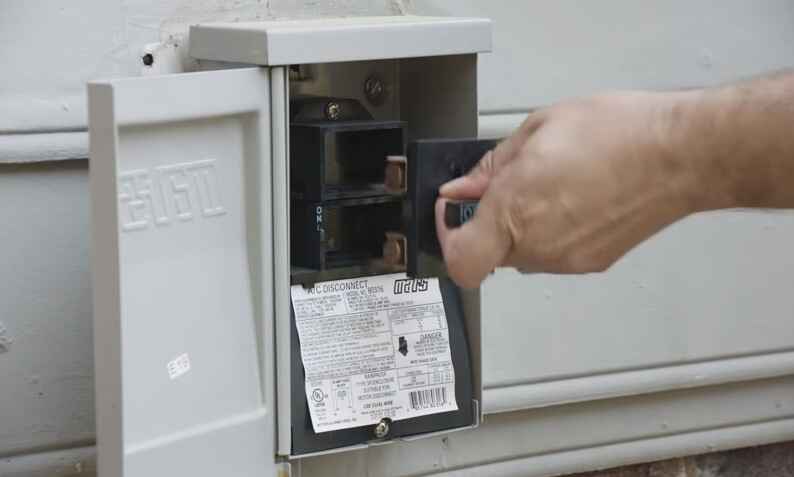
Importance of Turning off the Power:
1. Electrical Safety:
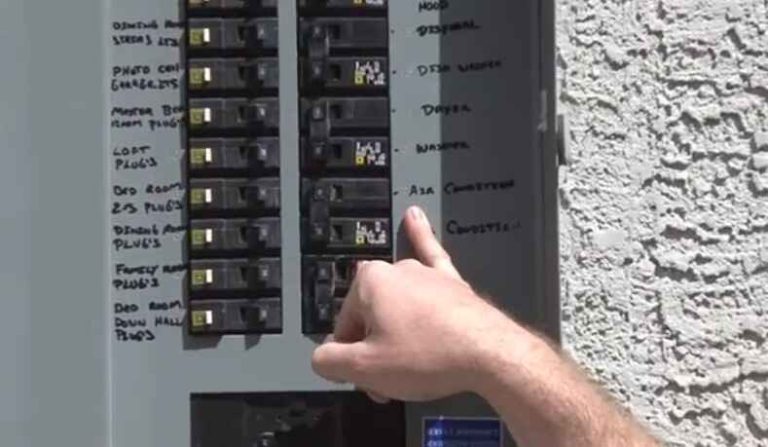
AC units are powered by electricity, and working on them while they’re connected can be extremely dangerous. Before cleaning, ensure the power to the unit is completely turned off at the main electrical panel.
2. Prevent Accidental Start-ups:
Turning off the power not only protects you from electrical shocks but also prevents the AC unit from accidentally starting while you’re cleaning it.
Use of Safety Gear (Gloves, Goggles):
1. Protective Gloves:
Wear sturdy, insulated gloves to protect your hands from sharp edges, debris, or any potential hazards you might encounter.
2. Safety Goggles:
Debris, dust, or small particles can be kicked up during the cleaning process. Protect your eyes by wearing safety goggles to prevent injuries.
Potential Hazards to be Aware of:
1. Sharp Objects:
Debris inside the AC unit may include sharp objects like broken pieces of metal or glass. Be cautious and handle debris with care to avoid cuts or punctures.
2. Chemical Exposure:
If you are using any cleaning agents, be aware of the potential for skin or eye irritation. Use appropriate chemicals in well-ventilated areas and follow safety guidelines for their use.
3. Fall Hazards:
If you are working at a height, such as on a ladder, be mindful of fall hazards. Ensure the ladder is stable and placed on a flat surface.
Remember, if you’re unsure about any aspect of cleaning or maintaining your AC unit, it’s always a good idea to consult the manufacturer’s guidelines or seek professional assistance. Regular maintenance and cleaning can improve the efficiency of your AC unit and contribute to a healthier indoor environment, but safety should always be the top priority.
Tools and Materials
Cleaning debris from an air conditioning (AC) unit is an important maintenance task to ensure optimal performance and efficiency. Here are some tools and materials you might need:
List of Necessary Tools:
1. Screwdriver:
You may need a screwdriver to remove panels or access points to reach the interior components of the AC unit.
2. Vacuum Cleaner with Nozzle Attachments:
Use a vacuum with nozzle attachments to remove loose debris such as dust, dirt, and cobwebs from the interior and exterior of the unit.
3. Fin Comb:
A fin comb is useful for straightening bent fins on the evaporator and condenser coils, which can improve the efficiency of the unit.
Recommended Cleaning Solutions:
1. Mild Detergent:
Mix a mild detergent with water to clean the exterior surfaces of the AC unit. Ensure the detergent is suitable for cleaning delicate surfaces.
2. Spray Bottle:
Use a spray bottle to apply a mixture of water and mild detergent for cleaning the exterior. This can help remove grime and dirt.
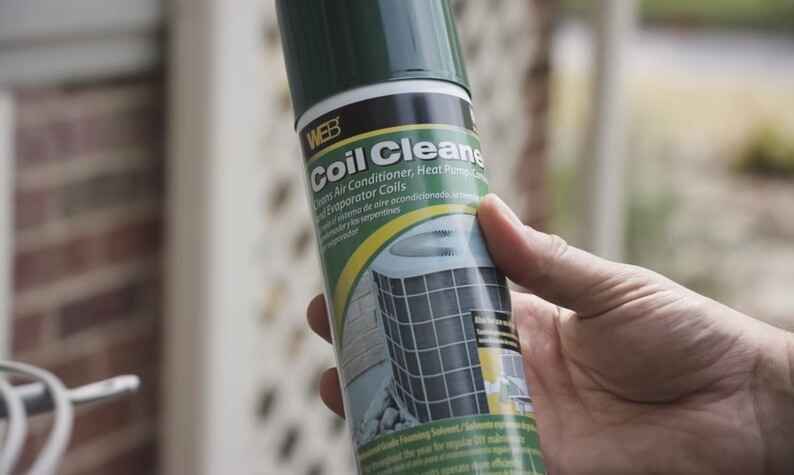
3. Coil Cleaner:
For deep cleaning of the coils, use a specialized coil cleaner. Follow the manufacturer’s instructions for the proper application.
4. Baking Soda and Water Paste:
Create a paste using baking soda and water for cleaning stubborn stains or dirt on surfaces. This is particularly useful for cleaning the exterior.
Optional Items for Deep Cleaning:
1. Coil Fin Straightening Tool:
In addition to a fin comb, a specialized fin-straightening tool can be used for more precise adjustment of bent fins on the coils.
2. Soft Bristle Brush:
A soft-bristle brush can be used to gently scrub away dirt and debris from hard-to-reach areas. Ensure it’s soft to avoid damaging delicate components.
3. Foaming Coil Cleaner:
Some prefer using a foaming coil cleaner for its ability to penetrate and clean coil surfaces effectively. Follow the manufacturer’s guidelines for usage.
4. Air Conditioner Coil and Fin Cleaner Tablets:
These tablets can be placed in the condensate pan to help prevent the growth of algae and mold. They often have cleaning properties that help keep the drain lines clear.
5. Gloves and Safety Glasses:
Wear protective gloves and safety glasses to safeguard yourself from cleaning solutions and any debris that may be dislodged during the cleaning process.
Remember to always refer to your specific AC unit’s user manual for any manufacturer recommendations or restrictions on cleaning products and procedures. If you are unsure or uncomfortable with certain aspects of cleaning, it’s advisable to consult with a professional HVAC technician.
Step-by-Step Guide on How to Clean Dirt from AC Unit

Cleaning debris from your air conditioning (AC) unit is essential for maintaining its efficiency and prolonging its lifespan. Here’s a step-by-step guide to help you clean debris from your AC unit:
Step 1: Remove Debris from the Exterior:
Clear Surrounding Area: Trim any vegetation or remove any debris around the outdoor unit to allow proper airflow.
Remove Large Debris: Use your hands or a tool to carefully remove any leaves, twigs, or other large debris from the top and sides of the unit.
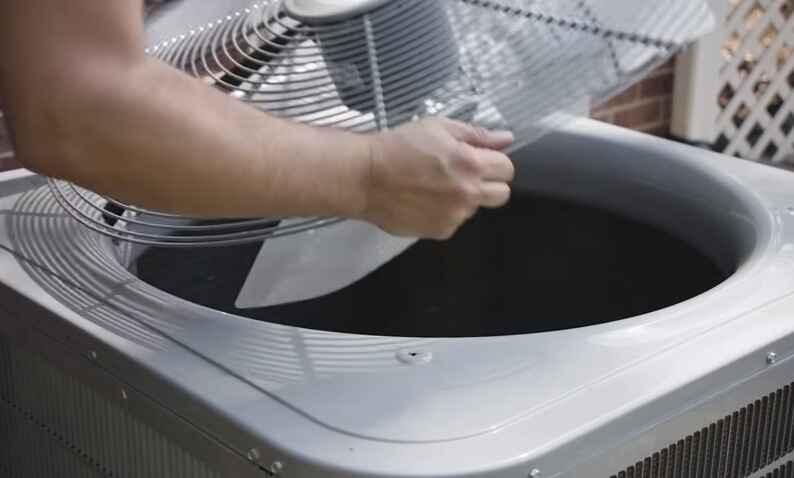
Step 2: Clean the Fins:
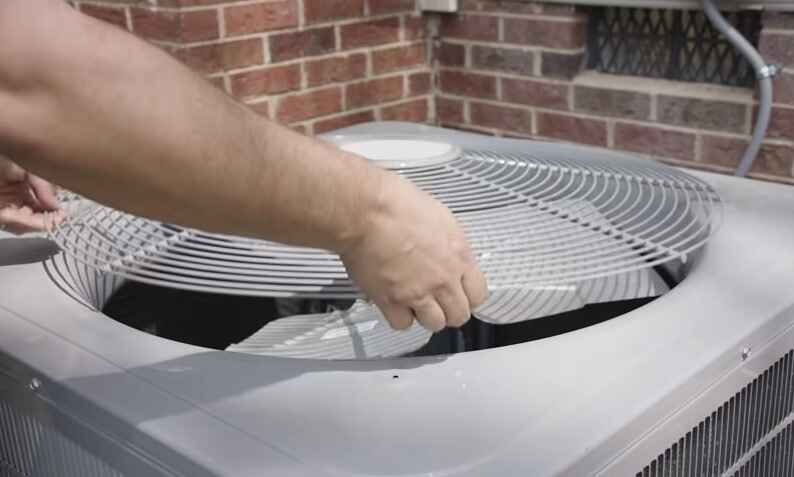
Remove the Fan Grill: Use a screwdriver to remove the screws securing the fan grill. Set the grill aside.
Clean the Fins: Gently brush or vacuum away debris from the fins. Be careful not to bend the fins, as this can affect the unit’s efficiency.
Straighten Bent Fins: If you notice any bent fins, use a fin comb to straighten them.
Step 3: Clean the Inside of the Unit:
Access the Interior: Remove the access panel to gain access to the interior components.
Inspect for Debris: Check for debris inside the unit, especially around the evaporator coil and blower. Remove any visible debris using a vacuum or by hand.
Step 4: Clean the Evaporator Coil (if accessible):
Spray with Cleaner (if needed): If the evaporator coil is dirty, you can use a mild detergent or coil cleaner. Follow the product instructions for application.
Allow to Dry: If you used a cleaner, allow the coil to dry completely before reassembling the unit.
Step 5: Reassemble the Unit:
Replace Access Panel: Secure the access panel back in place.
Reattach Fan Grill: Put the fan grill back in position and secure it with screws.
Step 6: Check for Level and Stability:
Ensure Level Placement: Make sure the AC unit is level on its pad or surface.
Check for Stability: Confirm that the unit is stable and not wobbly.
Step 7: Turn the Power Back On:
Restore Power: Turn the power back on at the thermostat or breaker.
Step 8: Monitor Performance:
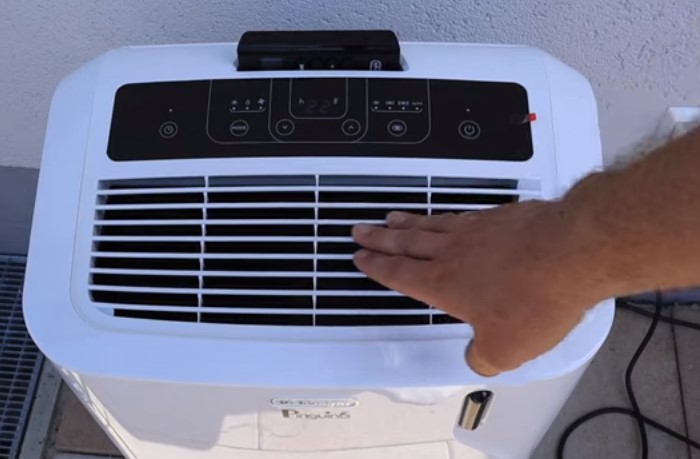
Observe Operation: Turn on your AC and observe its operation. Listen for any unusual sounds and check for proper airflow.
Performing these steps regularly, especially before the start of the cooling season, can help keep your AC unit in good condition. If you’re unsure or uncomfortable performing these tasks, consider consulting with a professional HVAC technician.
Regular Maintenance Schedule
Maintaining your air conditioning (AC) unit is crucial to ensure its optimal performance and longevity. Regular cleaning helps prevent debris buildup, improves efficiency, and reduces the risk of malfunctions. Here’s a suggested maintenance schedule based on monthly, quarterly, and annual tasks:
Monthly Tasks:
1. Inspect and Change Air Filters:
- Check the air filters every month.
- Replace or clean them as needed.
- Clean filters help maintain good air quality and improve efficiency.
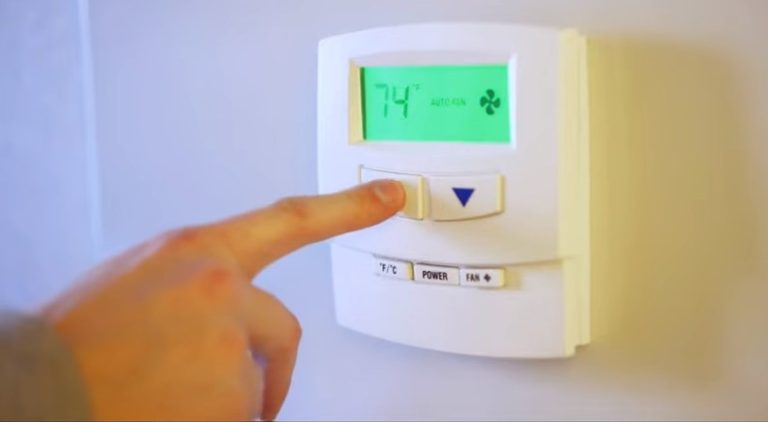
2. Check Thermostat Settings:
- Ensure the thermostat is set to the desired temperature.
- Consider upgrading to a programmable thermostat for energy efficiency.
Quarterly Tasks:
1. Clean the Condenser Coils:
- Turn off power to the AC unit.
- Remove debris from the condenser coils using a soft brush or compressed air.
- Trim any vegetation around the outdoor unit.
2. Inspect and Clean the Evaporator Coils:
- Check the indoor unit for dirt or mold on the evaporator coils.
- Clean the coils using a commercial coil cleaner if necessary.
3. Inspect and Clean the Condensate Drain:
- Ensure the condensate drain is clear of debris.
- Clean the drain using a mixture of bleach and water to prevent mold growth.
4. Check Refrigerant Levels:
- Inspect refrigerant levels and consult a professional if there’s a significant loss.
Annual Tasks:
1. Schedule Professional Inspection:
- Hire a professional HVAC technician for an annual inspection.
- They can check for leaks, test system components, and ensure everything is functioning properly.
2. Inspect Ductwork:
- Examine the ductwork for leaks and insulation issues.
- Seal any leaks to improve energy efficiency.
3. Inspect Insulation:
- Check insulation on refrigerant lines.
- Replace or repair insulation as needed.
4. Calibrate Thermostat:
- Ensure the thermostat is calibrated for accuracy.
Creating a Maintenance Calendar:
Monthly:
- Filter check and replacement.
Quarterly:
- January, April, July, October: Condenser coil cleaning.
- February, May, August, and November: Evaporator coil and condensate drain inspection and cleaning.
- March, June, September, December: Refrigerant level check and outdoor unit vegetation trimming.
Annually:
- Schedule a professional inspection in the spring or early summer.
Creating a calendar with reminders for each task ensures that maintenance becomes a routine part of your household schedule. Regular maintenance not only improves efficiency but also extends the life of your AC unit, saving you money on repairs and energy costs in the long run.
Troubleshooting Common Issues
Troubleshooting common issues with an air conditioning (AC) unit after cleaning involves addressing persistent problems, knowing when to seek professional help, and implementing tips for ongoing maintenance. Here’s a guide:
Addressing Persistent Problems After Cleaning:
1. Inadequate Cooling:
Possible Cause: Check if there’s a refrigerant leak, a dirty evaporator or condenser coil, or if the air filter is still clogged.
Solution: Recheck the coils and replace the filter if necessary. If the issue persists, there might be a refrigerant problem, and you should consult a professional.
2. Weak Airflow:
Possible Cause: A blocked or dirty air filter, issues with the blower motor, or obstructions in the ductwork.
Solution: Ensure the air filter is clean, inspect the blower motor, and check for any obstructions in the ducts. If the problem persists, professional assistance may be needed.
3. Strange Noises:
Possible Cause: Loose parts, damaged fan blades, or issues with the motor.
Solution: Tighten any loose parts, inspect the fan blades for damage, and lubricate the motor if needed. If the noises continue, a professional should assess the unit.
4. Water Leaks:
Possible Cause: Clogged drain lines, a dirty evaporator coil, or a refrigerant leak.
Solution: Clear the drain lines and clean the evaporator coil. If the issue persists, it might be a more complex problem requiring professional attention.
When to Seek Professional Help:
1. Electrical Issues:
If you encounter problems with the electrical components, such as the capacitor or wiring, it’s best to hire a professional electrician or HVAC technician.
2. Refrigerant Leaks:
Handling refrigerants requires expertise and specialized equipment. If you suspect a refrigerant leak, contact a licensed HVAC technician to address the issue.
3. Persistent Problems:
If the AC unit continues to malfunction despite your efforts, it’s advisable to seek professional help to prevent further damage.
Tips for Ongoing Maintenance:
1. Regular Filter Replacement:
Change or clean the air filter regularly, usually every 1-3 months, depending on the type of filter and usage.
2. Coil Cleaning:
Clean the evaporator and condenser coils annually to ensure efficient heat exchange.
3. Clearing Debris:
Regularly check and clear debris from the outdoor unit, ensuring good airflow.
4. Thermostat Calibration:
Verify that the thermostat is calibrated correctly to maintain a comfortable temperature without overworking the system.
5. Professional Maintenance:
Schedule professional maintenance at least once a year to address issues that might not be apparent during regular cleaning.
By addressing persistent problems, knowing when to seek professional help, and implementing ongoing maintenance, you can keep your AC unit running efficiently and extend its lifespan.
Conclusion
In conclusion, maintaining a clean AC unit is crucial for optimal performance and energy efficiency. Regularly removing debris not only extends the lifespan of your unit but also ensures the air circulating in your home remains clean and healthy. By following the simple steps outlined in this guide, you can easily tackle debris buildup and keep your AC unit running smoothly. Remember, a well-maintained AC not only provides comfort but also contributes to a more sustainable and cost-effective home environment. Take the time to care for your AC unit, and you’ll reap the benefits of a cool and clean indoor atmosphere.
57 Comments